Automated Customer Service via Conversational Artificial Intelligence (AI) - Using Amazon Web Services (AWS) Connect, Lambda, DynamoDb, S3, Node.js, ReactJS, Axios & Bootstrap 4

Scenario
Have you ever needed to run a contact centre to service your customers? Perhaps you’ve struggled to handle the customer query throughput with your team of agents, for what are essentially the most commonly asked customer service questions…?
Today, we’re going to automate that entire process using the most current and leading technologies, thus removing the need for customers to have human interaction by replacing this with conversational artificial intelligence (AI).
What We Are Going To Code Today
- A (fully automated), cloud hosted, customer service contact centre.
- The ability for a customer to obtain their account balance automatically based on their phone number, without interacting with a human being.
- A simple admin website to view our existing customer database.
Technologies Used
- ReactJS.
- Bootstrap 4.
- Axios.
- Node.js.
- AWS Api Gateway.
- AWS Connect.
- AWS Lambda Serverless Functions.
- AWS DynamoDb.
- AWS S3 Buckets.
A Few Things To Mention
- Our nearest region to the UK that runs Amazon Connect is in Frankfurt. Given this, we’ll be implementing all of our tech stack in Amazon’s eu-central-1 region.
- AWS IAM is not bound to a specific AWS region and is therefore applied globally by default.
Functionality Process Flow
For transparency, here’s a summary 3D UML diagram to show you the process flow of the functionality we are about to implement.
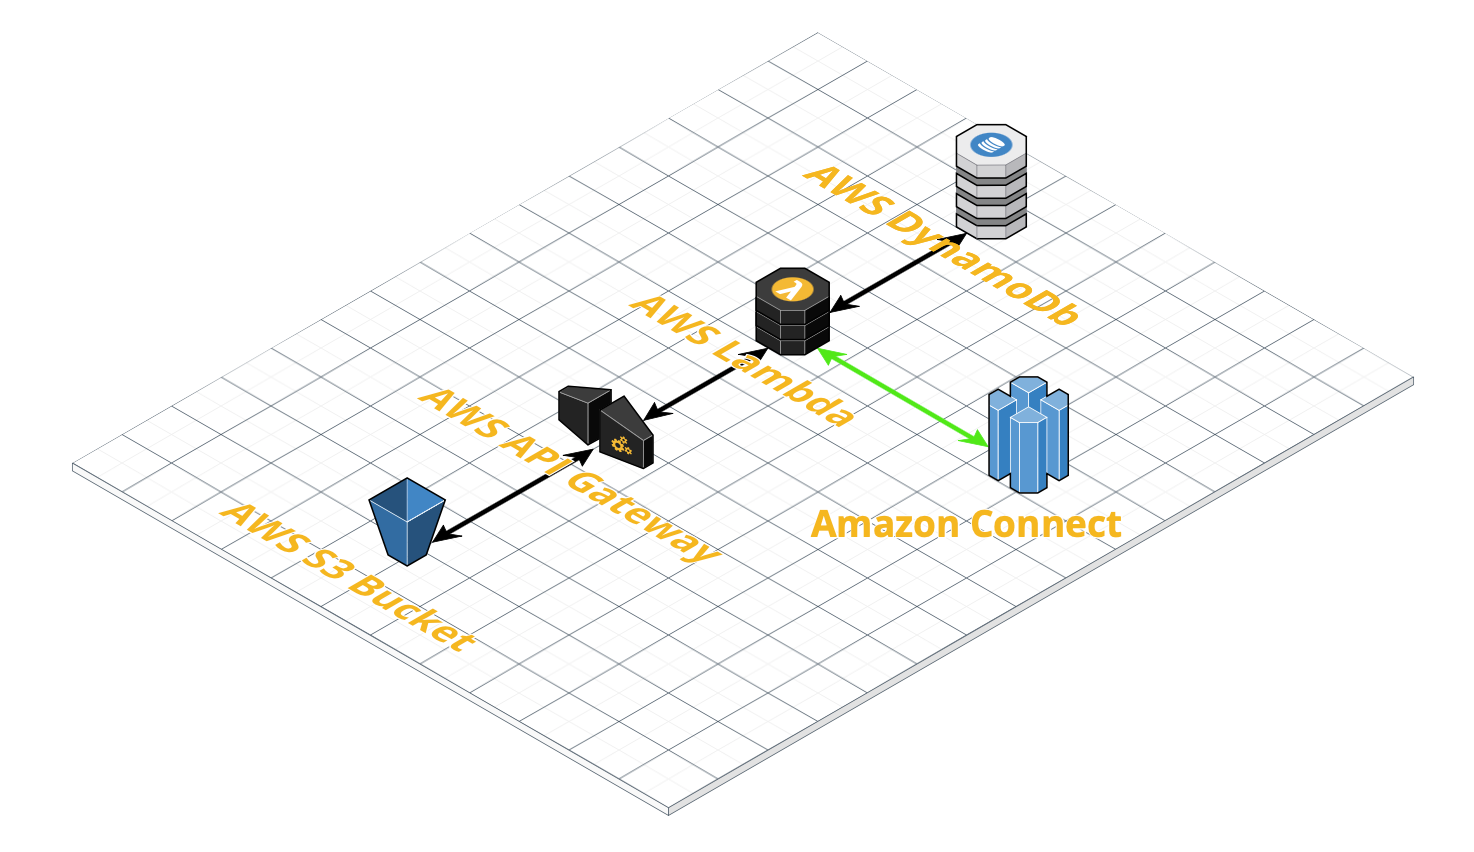
Conversational AI - AWS Connect, Lambda, DynamoDb, S3, Node.js, ReactJS, Axios & Bootstrap 4
Prerequisites
Before we get started, head to the IAM section of Amazon Web Services (AWS) and create a new user. For simplicity, we are going to apply all of the necessary roles that are required for this implementation to a single IAM user (however in reality, this is drastically unwise, so just a heads up).
For ease of use, the roles that we require are as follows -

Conversational AI - AWS Connect, Lambda, DynamoDb, S3, Node.js, ReactJS, Axios & Bootstrap 4
Let’s Code…
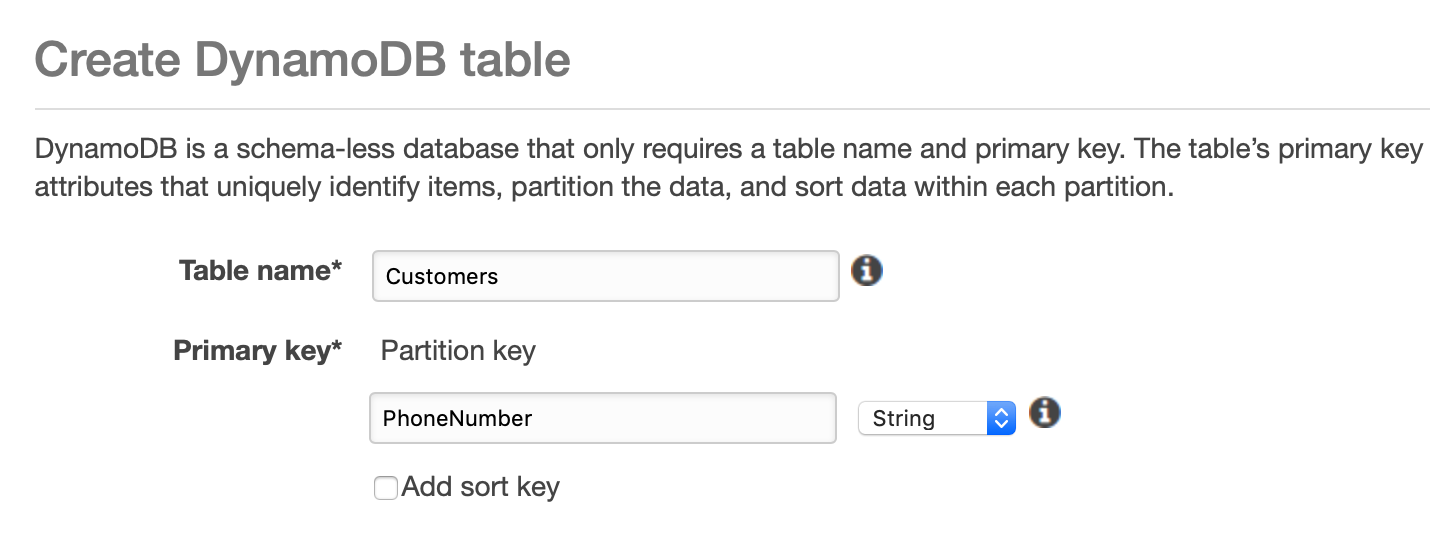
Let’s start by building our database schema using DynamoDb. Navigate to Amazon Web Services (AWS) and open the DynamoDb section.

Conversational AI - AWS Connect, Lambda, DynamoDb, S3, Node.js, ReactJS, Axios & Bootstrap 4
Click “Create Table”…
Conversational AI - AWS Connect, Lambda, DynamoDb, S3, Node.js, ReactJS, Axios & Bootstrap 4
We’re going to create a simple “Customers” table with the primary key being the customers phone number.
Conversational AI - AWS Connect, Lambda, DynamoDb, S3, Node.js, ReactJS, Axios & Bootstrap 4
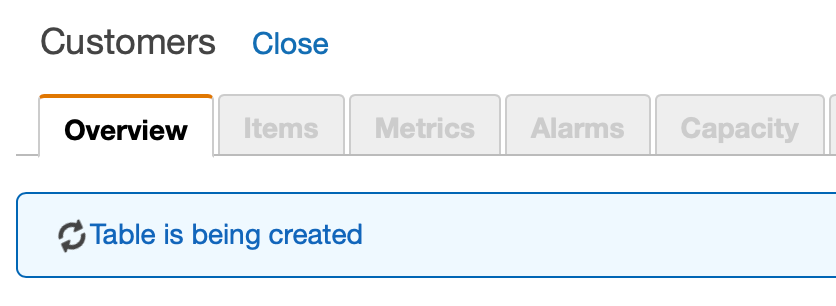
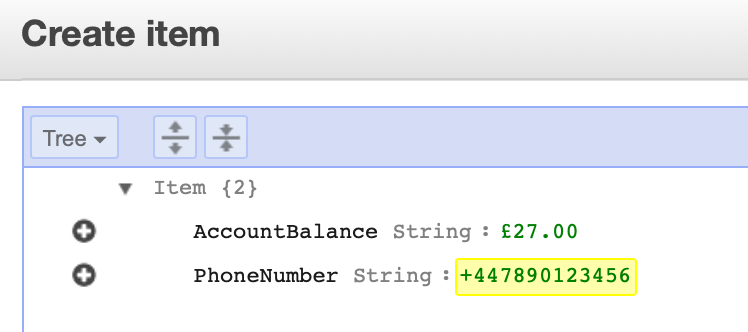
Ok great, our “Customers” table has been created in DynamoDb. Let’s add some test data to help us along the way.
Conversational AI - AWS Connect, Lambda, DynamoDb, S3, Node.js, ReactJS, Axios & Bootstrap 4
Looks good, so let’s begin coding Lambda!
AWS Serverless Lambda Functions (Node.js)
Now to interact with our DynamoDb database using serverless Lambda functions.

Conversational AI - AWS Connect, Lambda, DynamoDb, S3, Node.js, ReactJS, Axios & Bootstrap 4
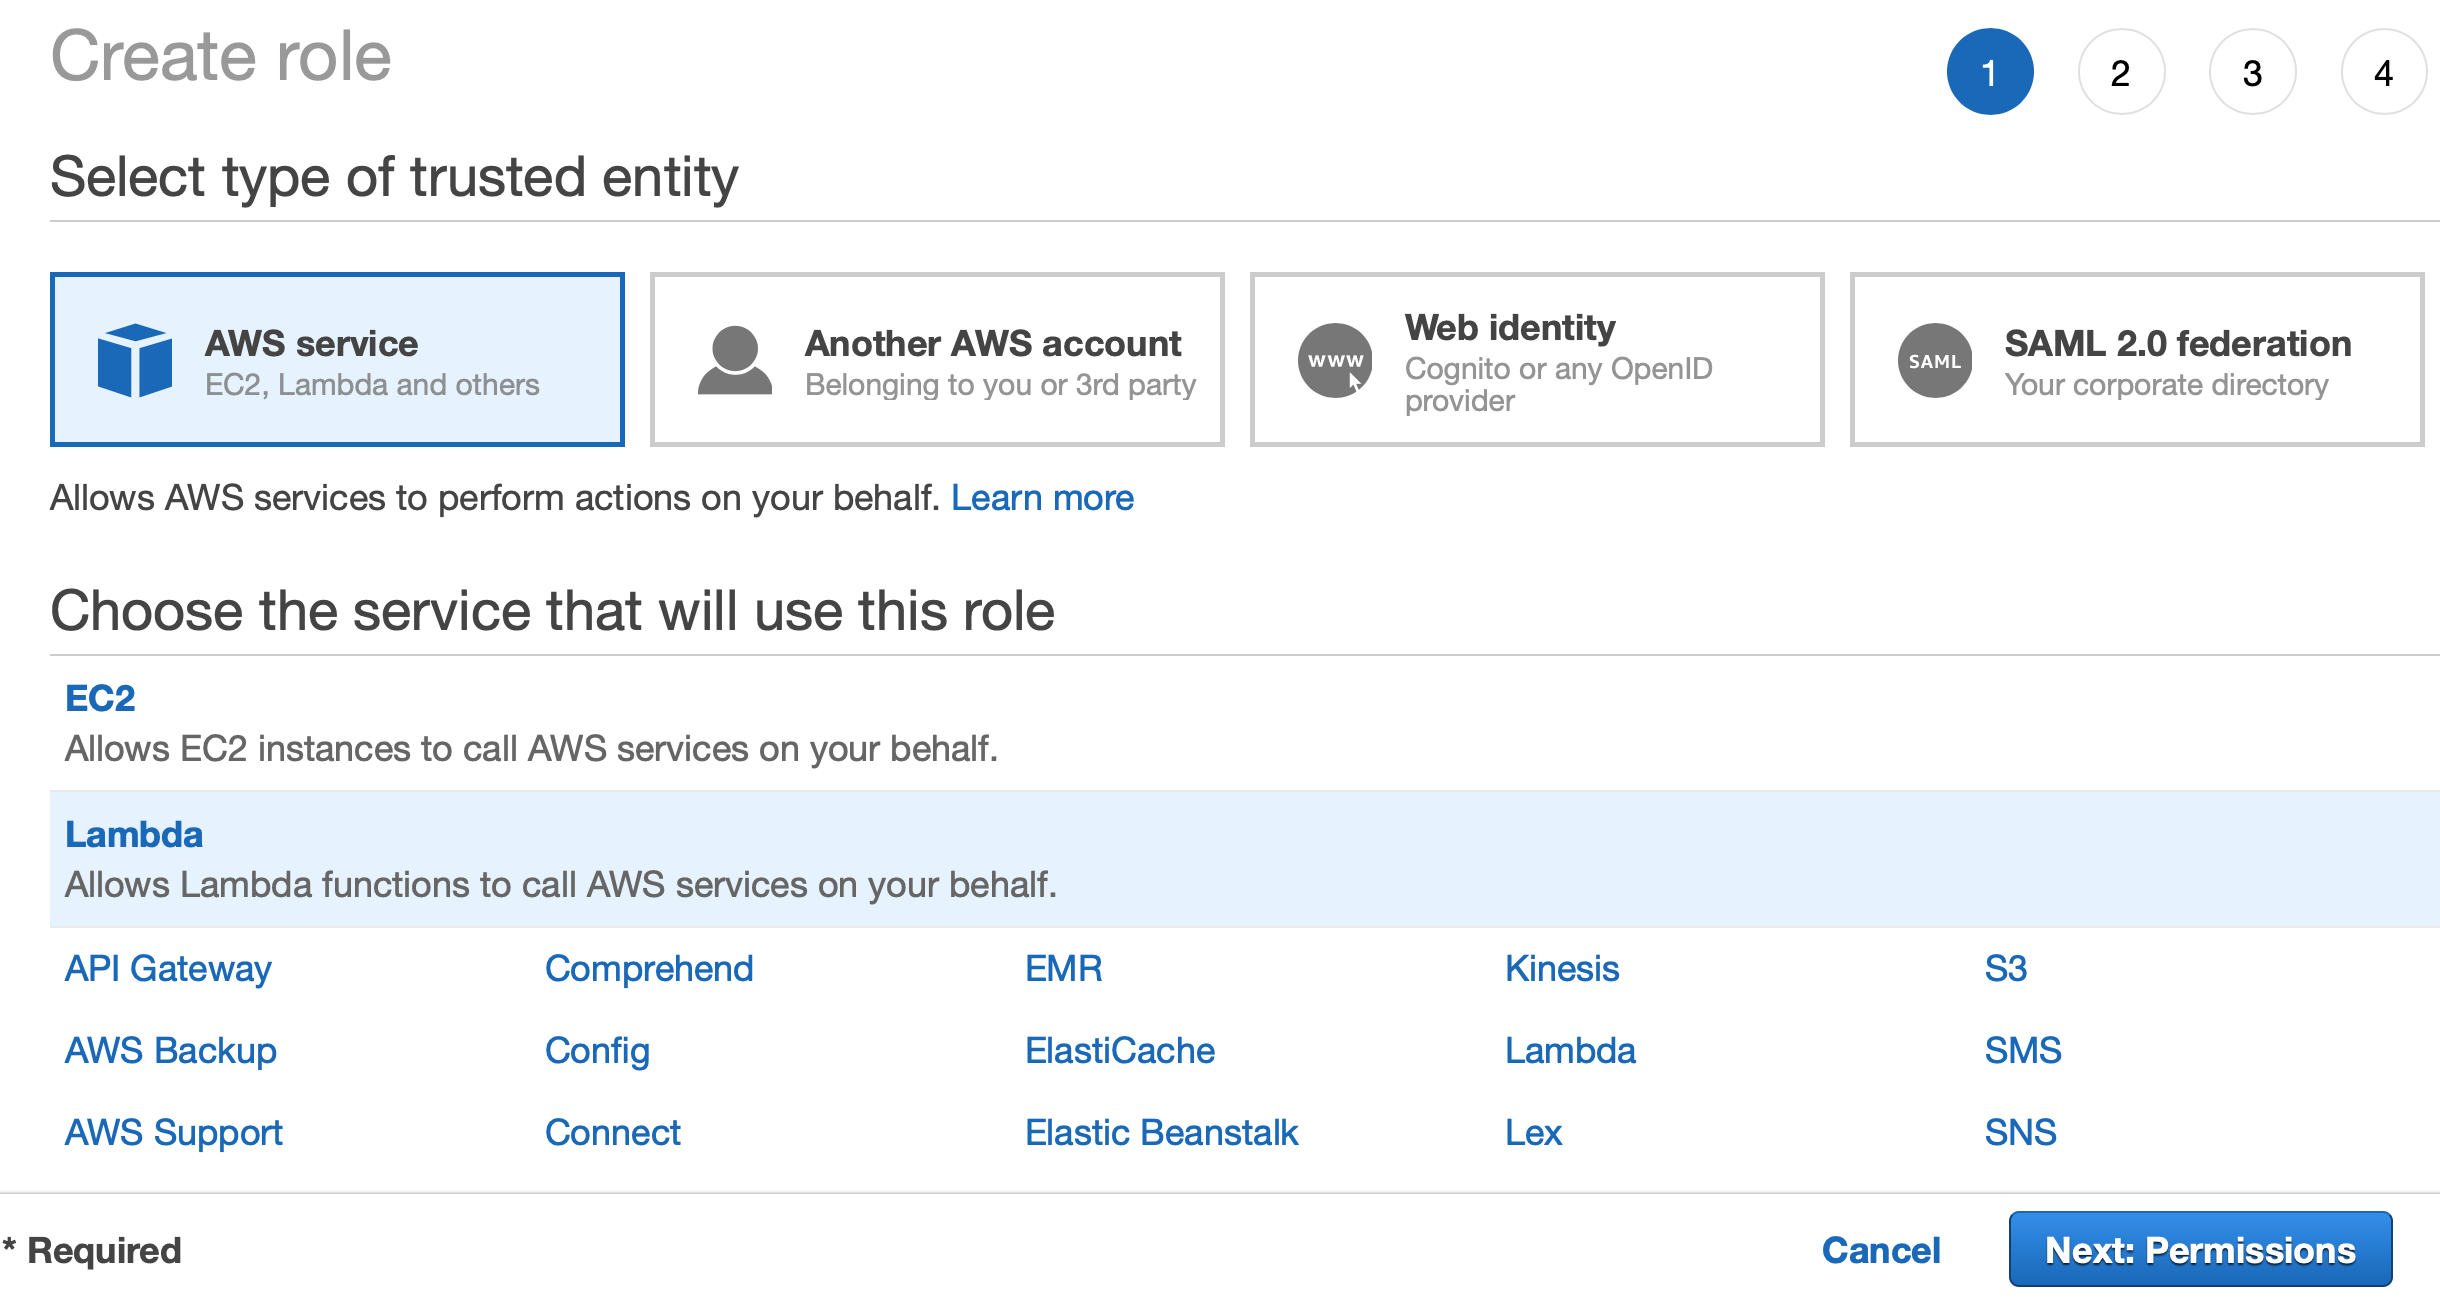
Before we code this, we need to head back to the IAM section of AWS and create a new role that allows Lambda to access DynamoDb.
Conversational AI - AWS Connect, Lambda, DynamoDb, S3, Node.js, ReactJS, Axios & Bootstrap 4
Choose the type of trusted entity.

Conversational AI - AWS Connect, Lambda, DynamoDb, S3, Node.js, ReactJS, Axios & Bootstrap 4
Attach the relevant permissions. In this case we want Lambda to have full access to DynamoDb.
Conversational AI - AWS Connect, Lambda, DynamoDb, S3, Node.js, ReactJS, Axios & Bootstrap 4
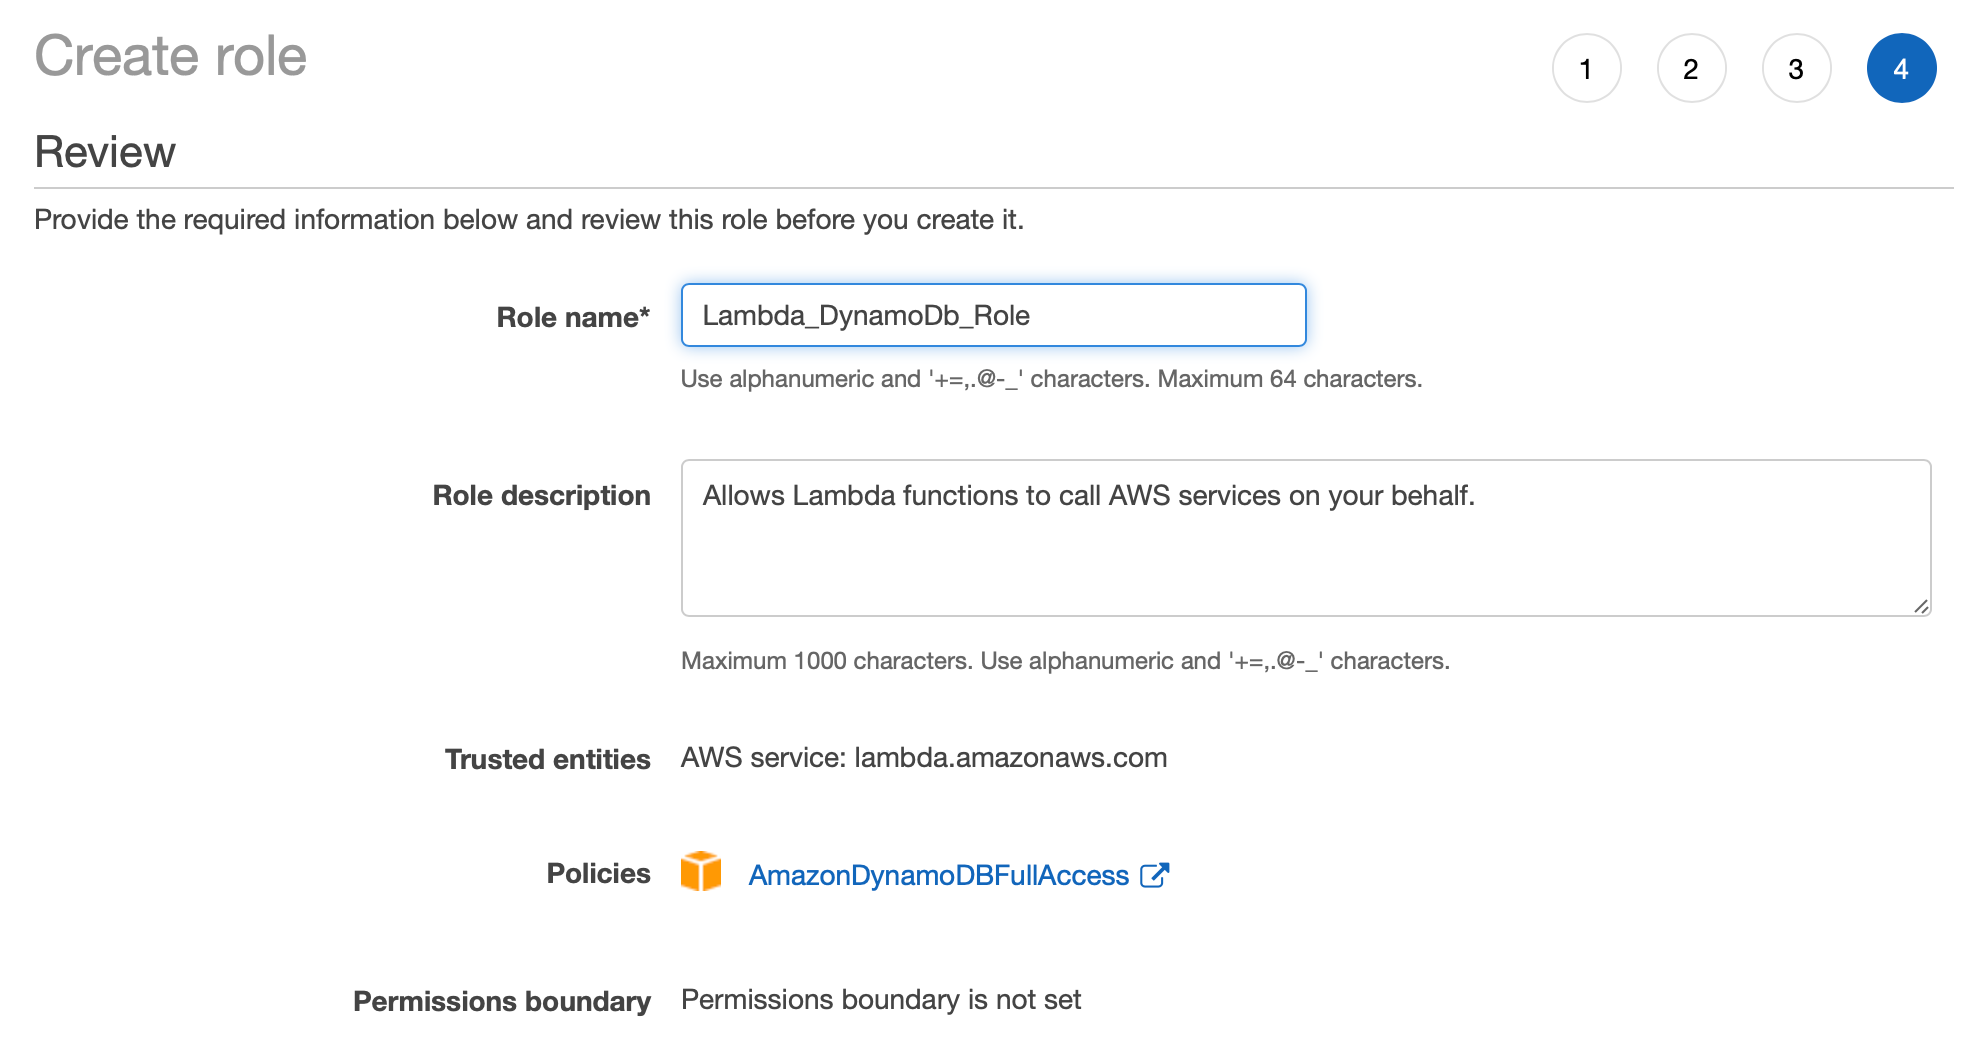
Give the role a relevant name, for clarity later on when we make use of it.

Conversational AI - AWS Connect, Lambda, DynamoDb, S3, Node.js, ReactJS, Axios & Bootstrap 4
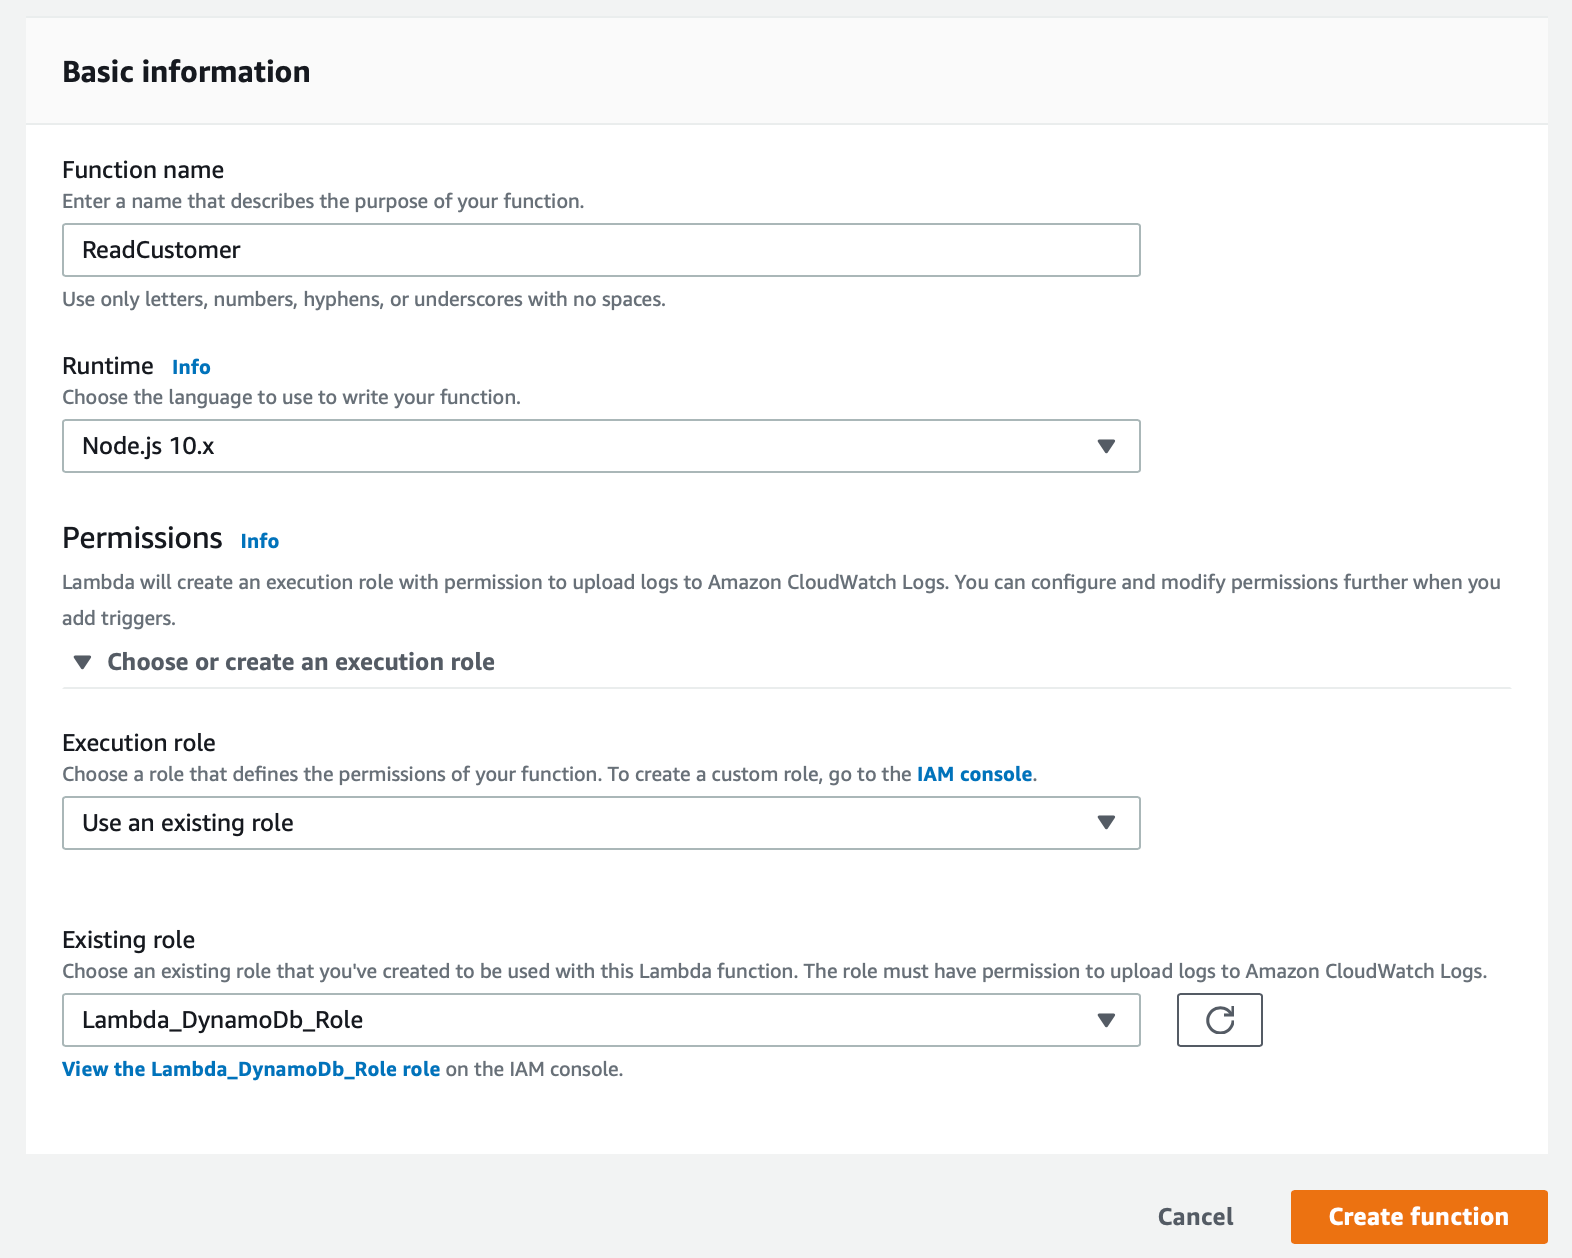
Next, in the Lambda section of AWS, let’s go ahead and create three new function implementations - CREATE, READ and READ ALL. For simplicity, I’ll only cover one of these Lambda functions in this blog post.
Conversational AI - AWS Connect, Lambda, DynamoDb, S3, Node.js, ReactJS, Axios & Bootstrap 4
When setting up the Lambda, we choose to use the IAM role that we just created, thus giving Lambda full access to DynamoDb.
Conversational AI - AWS Connect, Lambda, DynamoDb, S3, Node.js, ReactJS, Axios & Bootstrap 4
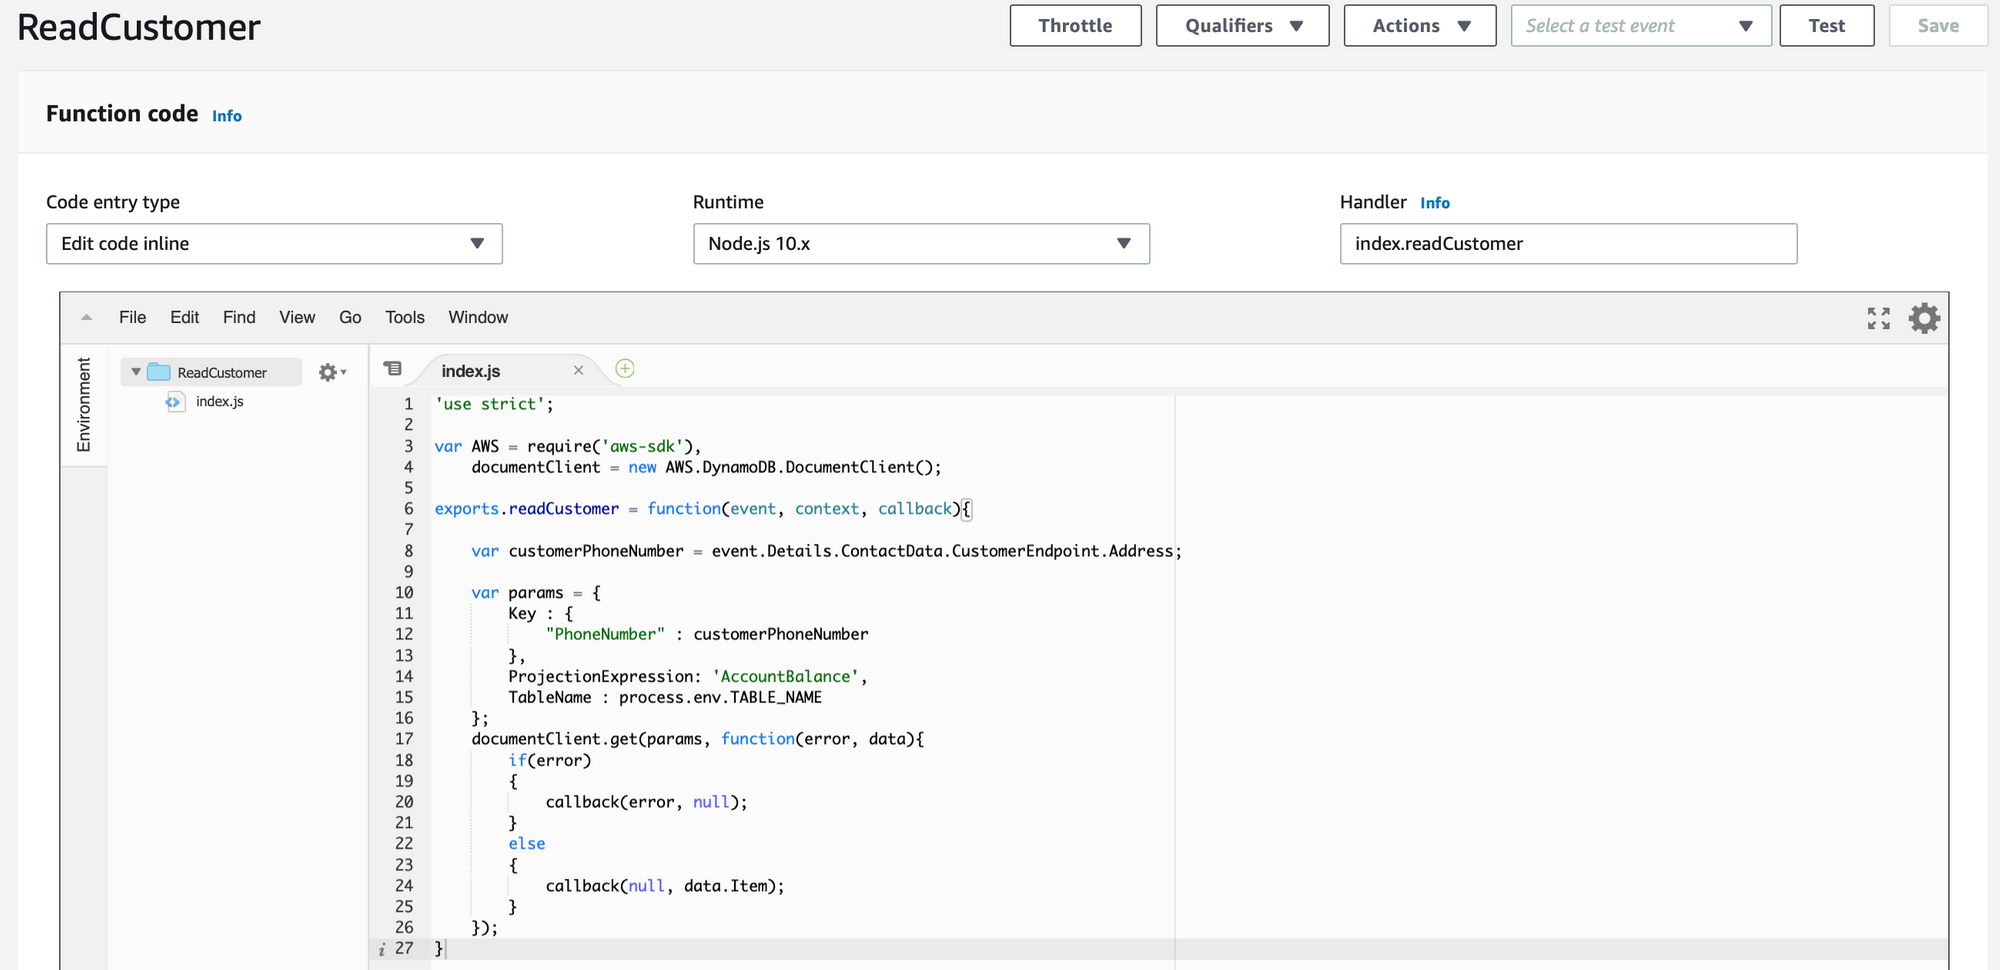
Next we add our Node.js code to create a new customer in our DynamoDb database. Note that the handler name matches the Node.js function name.
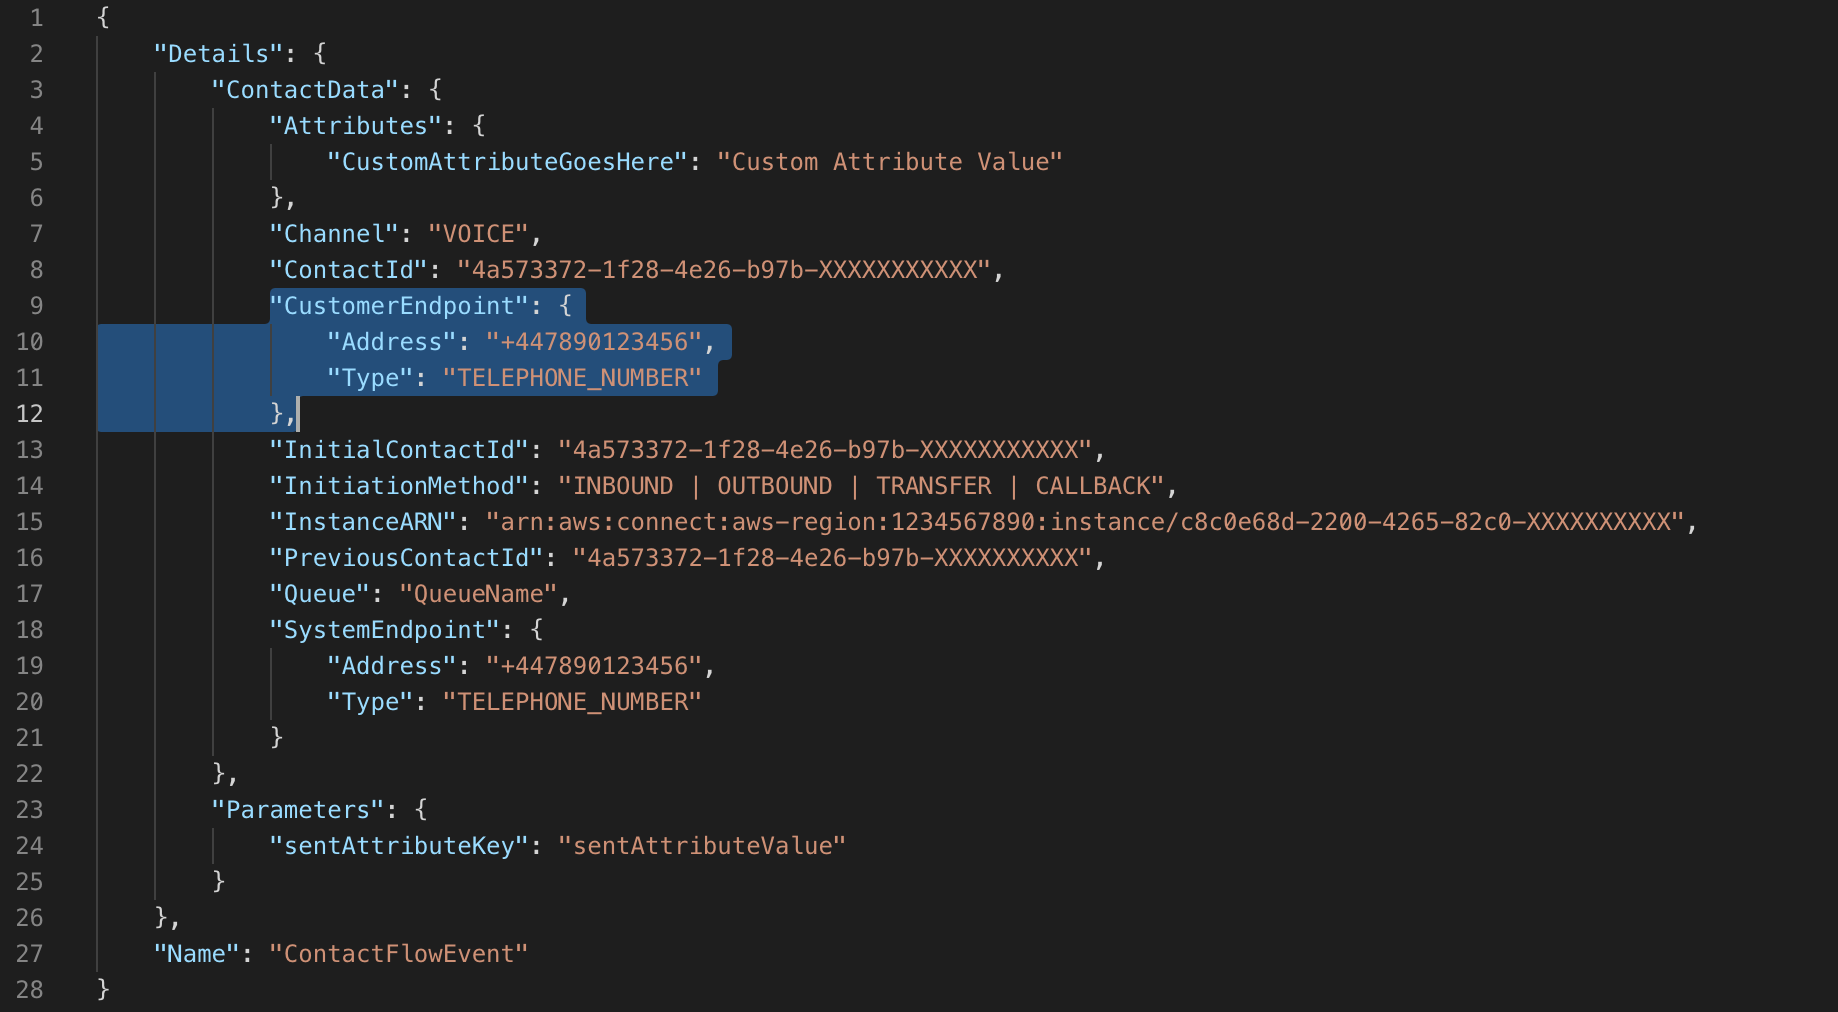
Another key aspect to point out here is line 8 in our Node.js code. This is where we obtain the callers phone number, which is part of the default data schema used in Amazon Connect, and is available for every phone call that is made to our contact centre.
Finally, let’s add an environment variable for our DynamoDb database table name.

Conversational AI - AWS Connect, Lambda, DynamoDb, S3, Node.js, ReactJS, Axios & Bootstrap 4
For each serverless Lambda function, we need to ensure we test the code we’ve written and check that the results are as expected, thus indicating that our Lambda has access to DynamoDb via the IAM role we created.
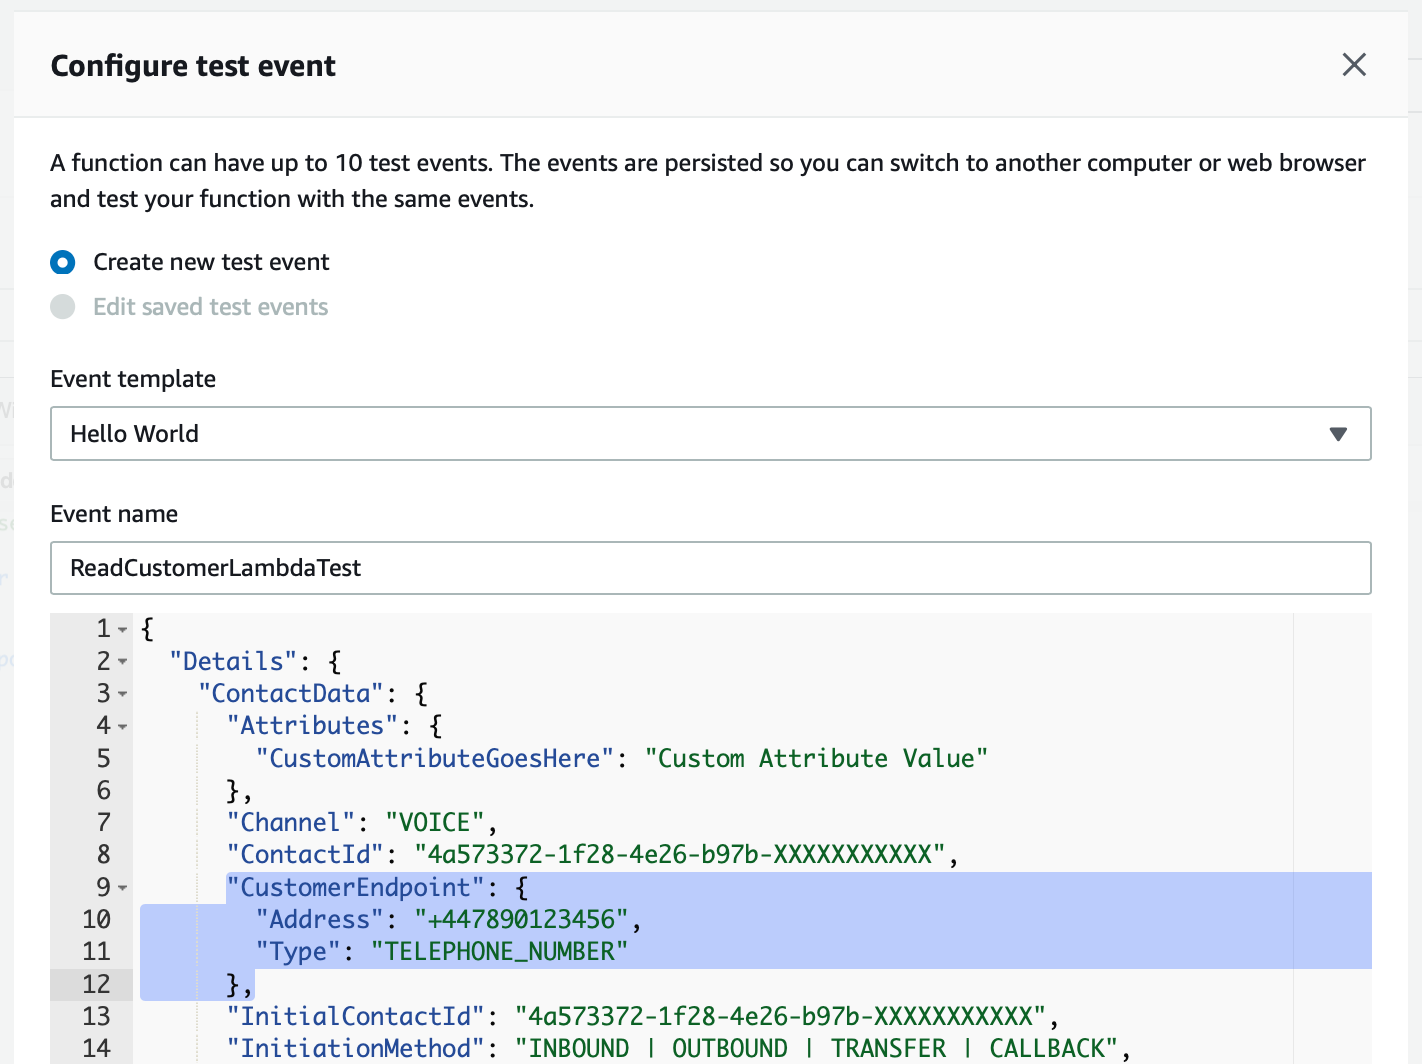
Let’s take a look at our test data, which is a version of the default Amazon Connect data schema that is filled with the relevant information for each incoming call. Note the part that I’ve highlighted.
Conversational AI - AWS Connect, Lambda, DynamoDb, S3, Node.js, ReactJS, Axios & Bootstrap 4
Now let’s configure a test event using this data in AWS Lambda.
Conversational AI - AWS Connect, Lambda, DynamoDb, S3, Node.js, ReactJS, Axios & Bootstrap 4
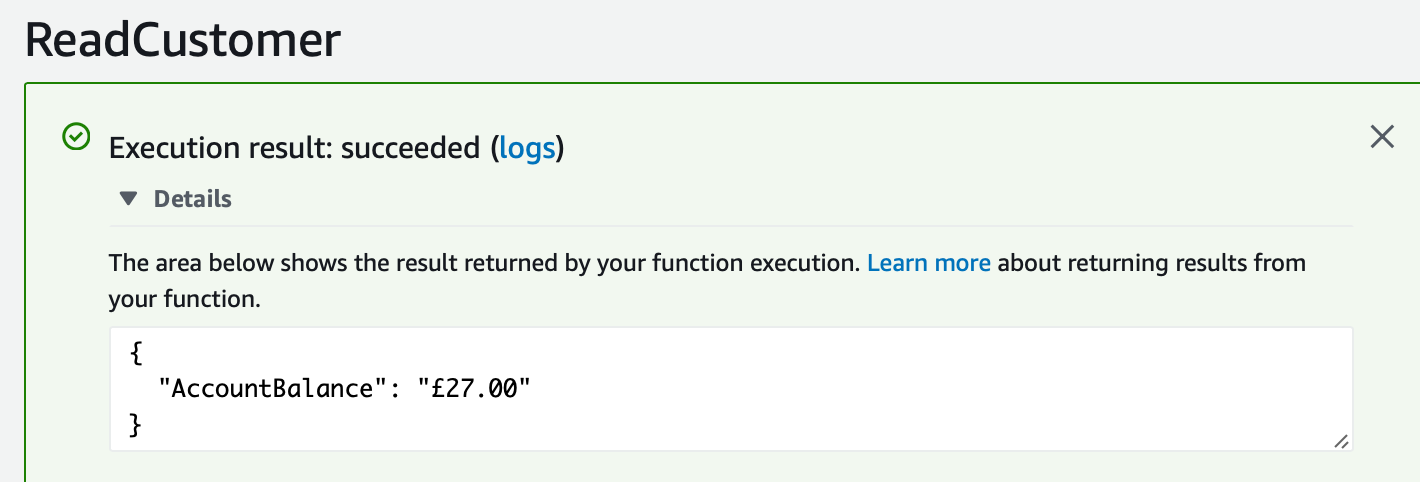
Finally let’s run our test and check that it works.
Conversational AI - AWS Connect, Lambda, DynamoDb, S3, Node.js, ReactJS, Axios & Bootstrap 4
The test is passing successfully, and returning the data we expected to see from DynamoDb based on the phone number we submitted to the function.
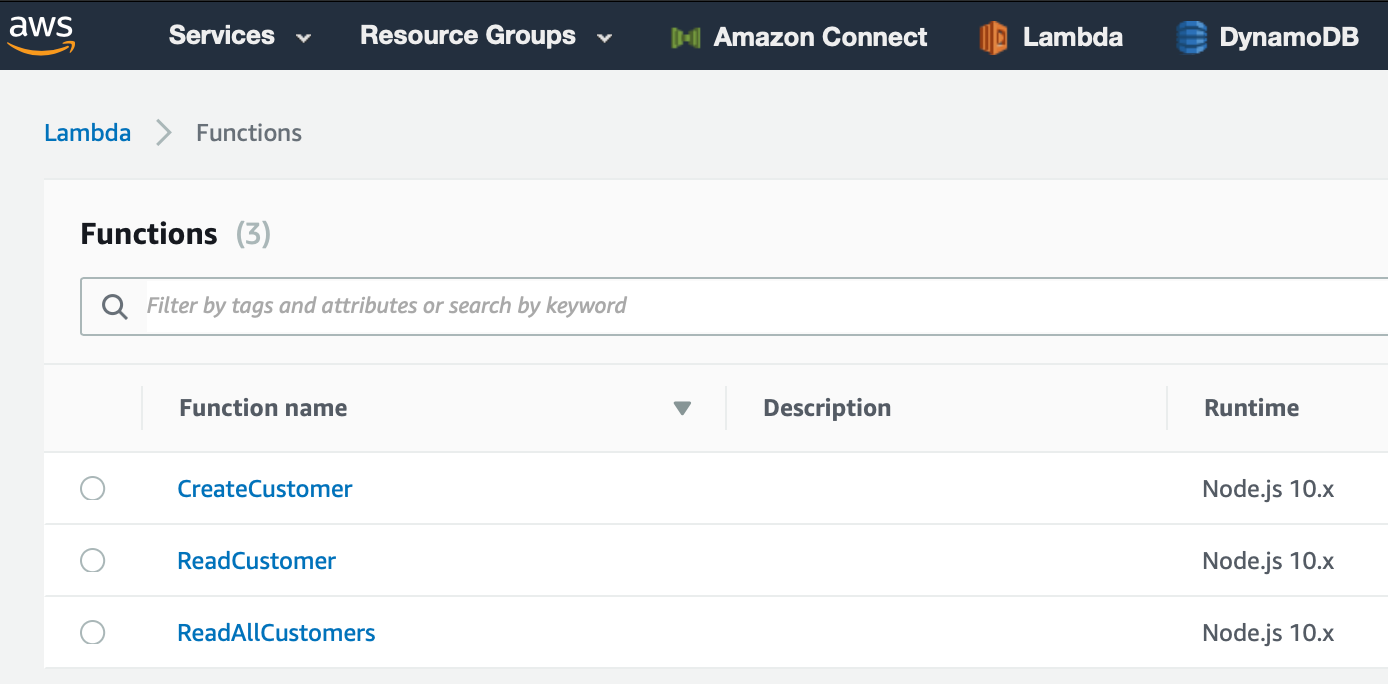
The end result should be that we have our three Lambda serverless functions implemented and tested.
Conversational AI - AWS Connect, Lambda, DynamoDb, S3, Node.js, ReactJS, Axios & Bootstrap 4
Amazon Connect - Conversational Artificial Intelligence
Now to use Amazon Connect to build the customer service contact centre, making use of text-to-speech and providing a fully automated interaction for our customer, between themselves and our dummy corporation.

Conversational AI - AWS Connect, Lambda, DynamoDb, S3, Node.js, ReactJS, Axios & Bootstrap 4
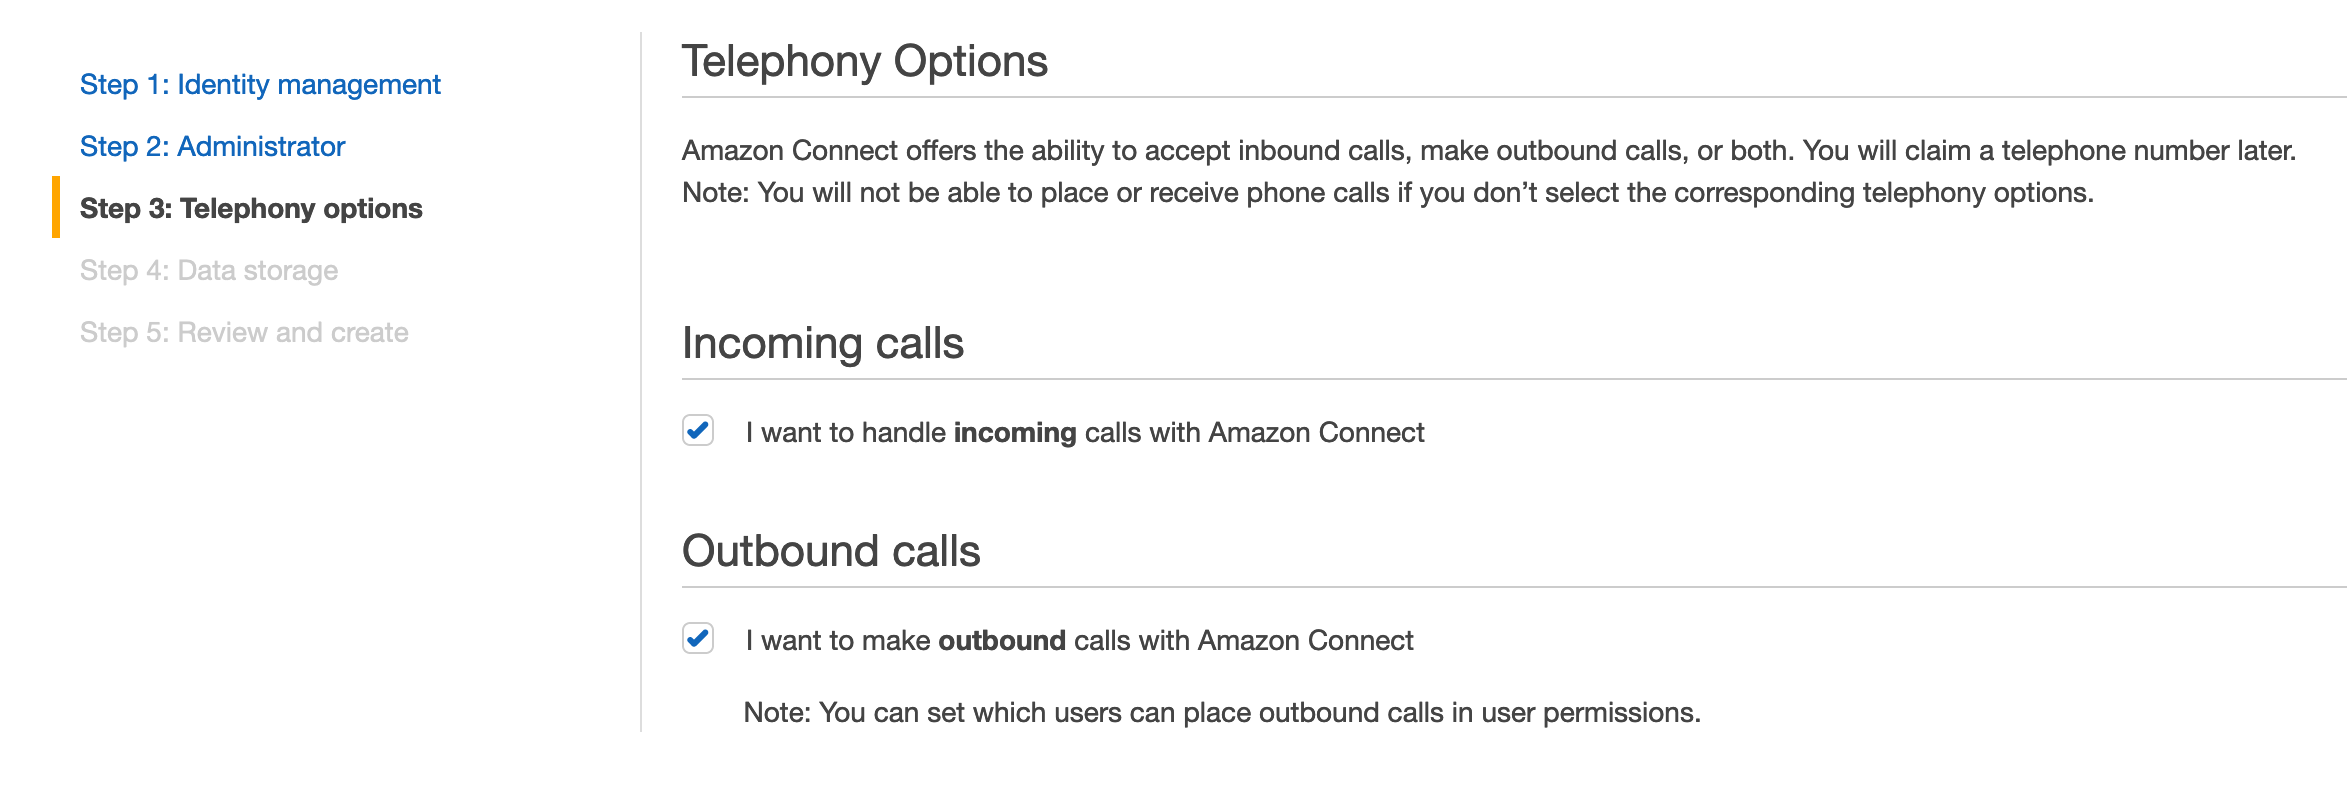
Once you’ve chosen a specific access url for your agents to use, followed by the relevant identity management for your business, you can choose the telephony options.
Conversational AI - AWS Connect, Lambda, DynamoDb, S3, Node.js, ReactJS, Axios & Bootstrap 4
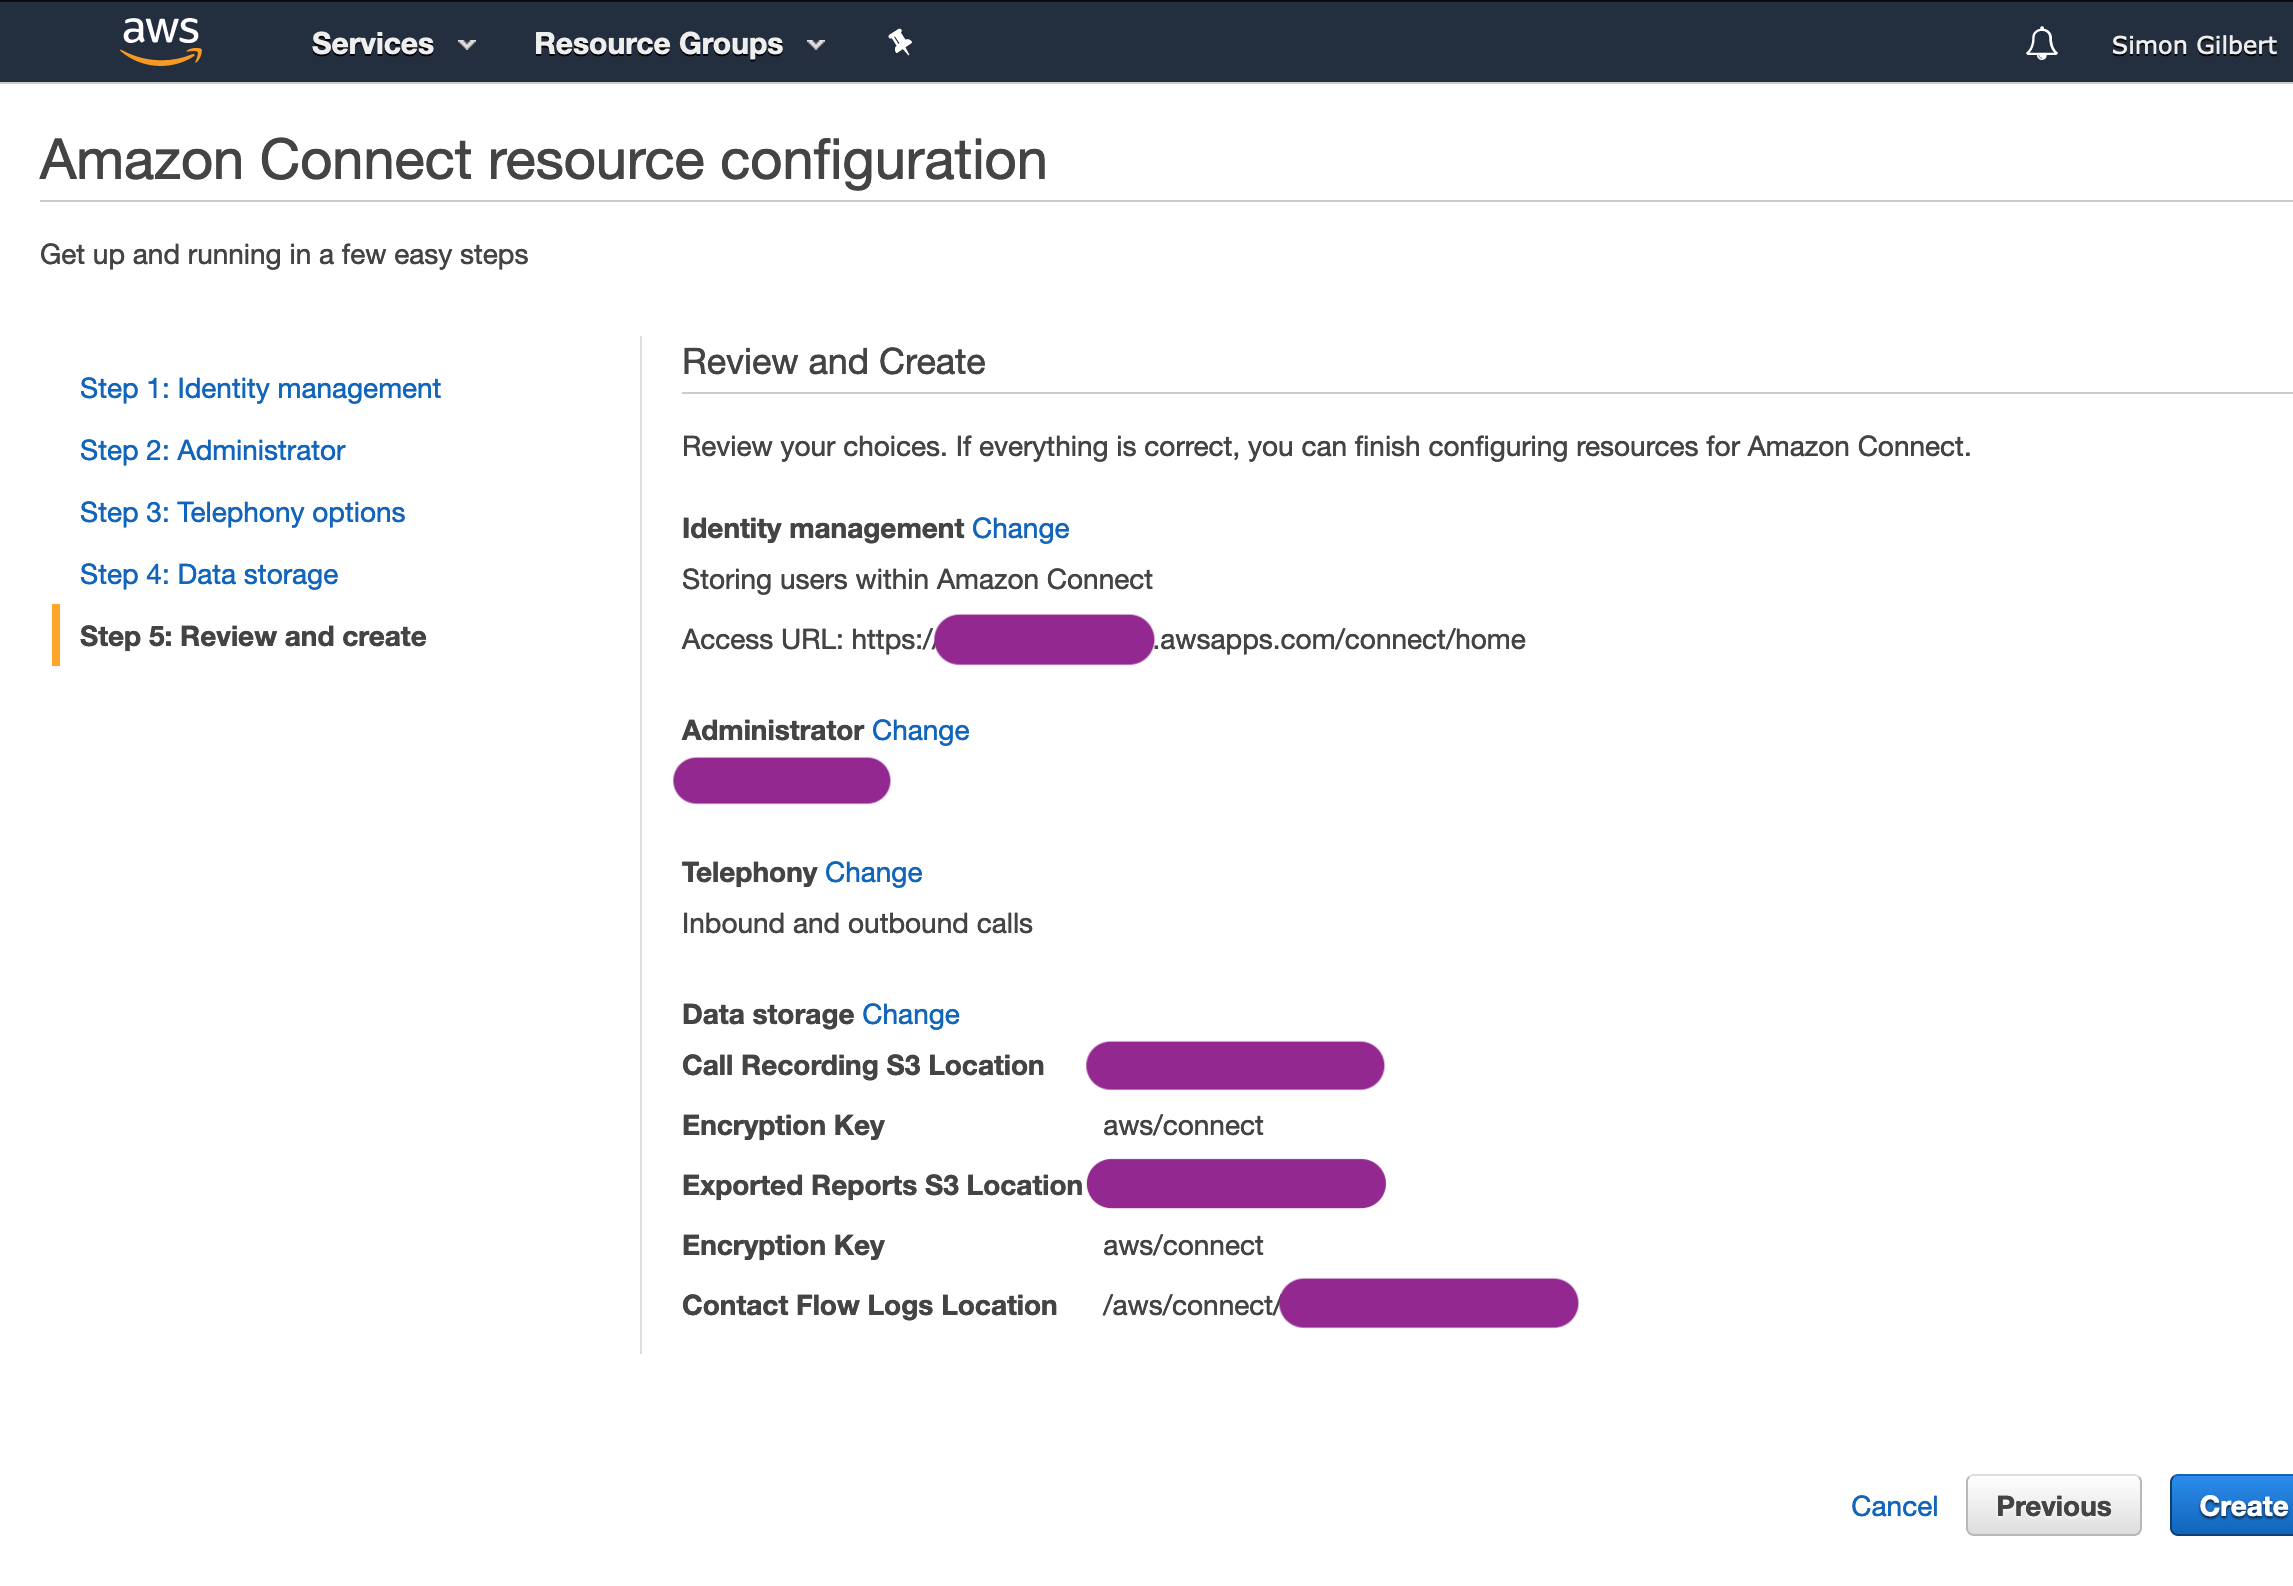
Finally let’s review the configuration we have entered for our Amazon Connect telephony service.
Conversational AI - AWS Connect, Lambda, DynamoDb, S3, Node.js, ReactJS, Axios & Bootstrap 4
Looks good, let’s create our instance!

Conversational AI - AWS Connect, Lambda, DynamoDb, S3, Node.js, ReactJS, Axios & Bootstrap 4
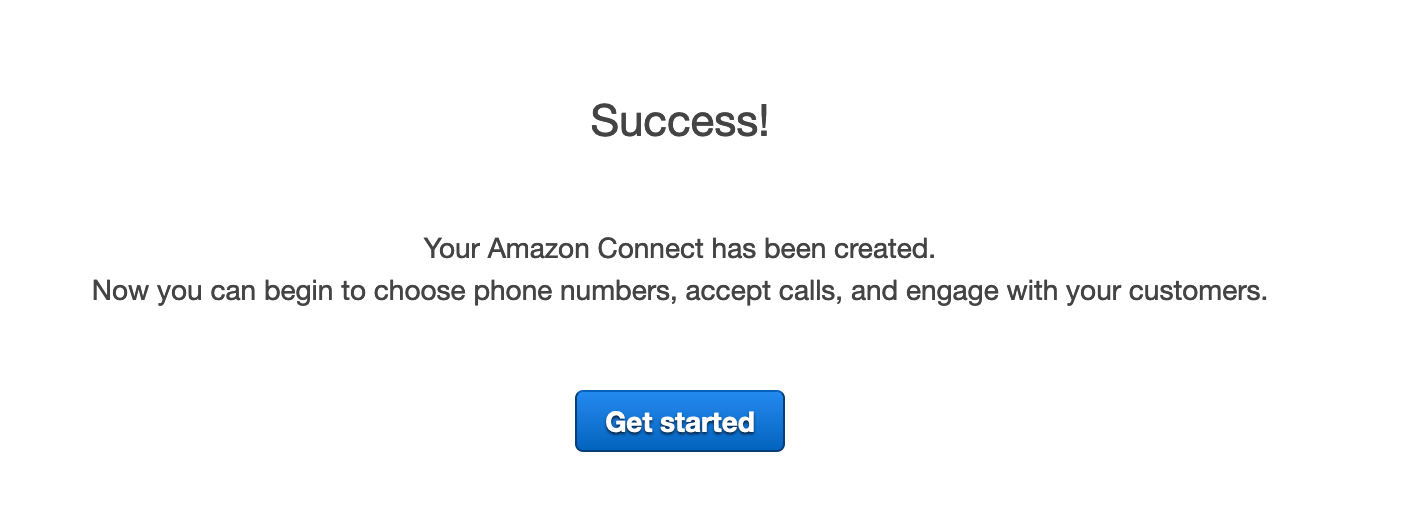
Boom! Now to get started on our conversational artificial intelligence implementation!!
Conversational AI - AWS Connect, Lambda, DynamoDb, S3, Node.js, ReactJS, Axios & Bootstrap 4
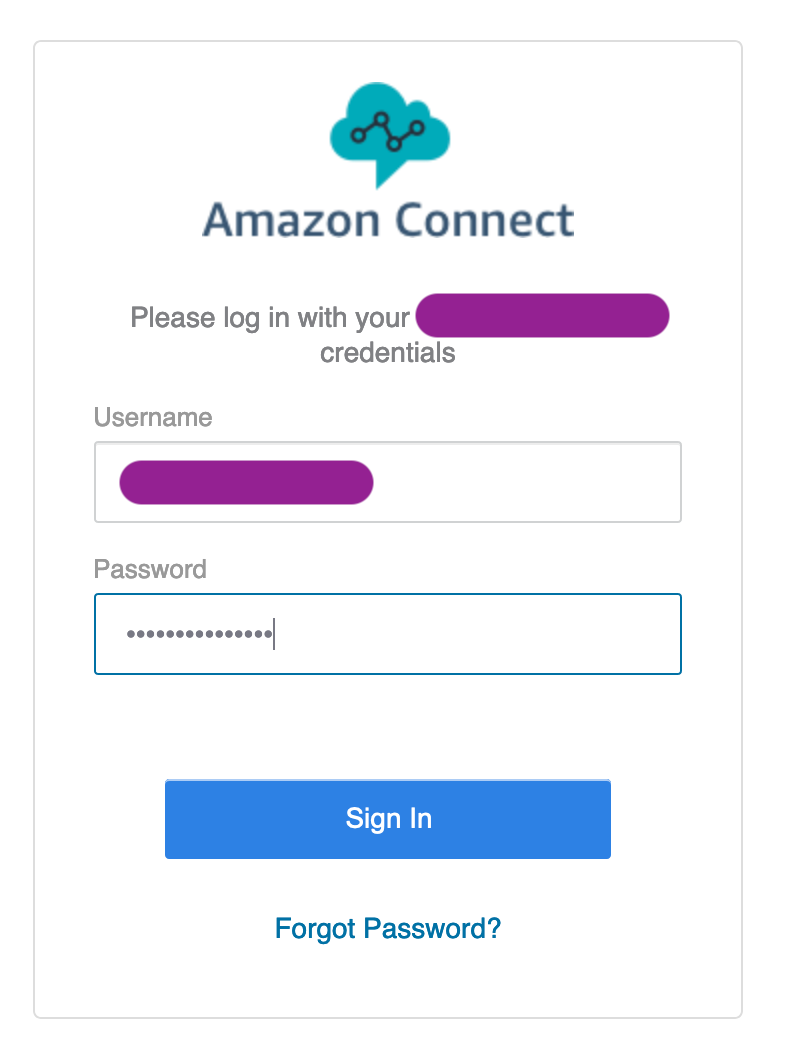
First, we need to log in to our Amazon Connect instance, using the administrator account details that we created when setting up Amazon Connect.
Conversational AI - AWS Connect, Lambda, DynamoDb, S3, Node.js, ReactJS, Axios & Bootstrap 4
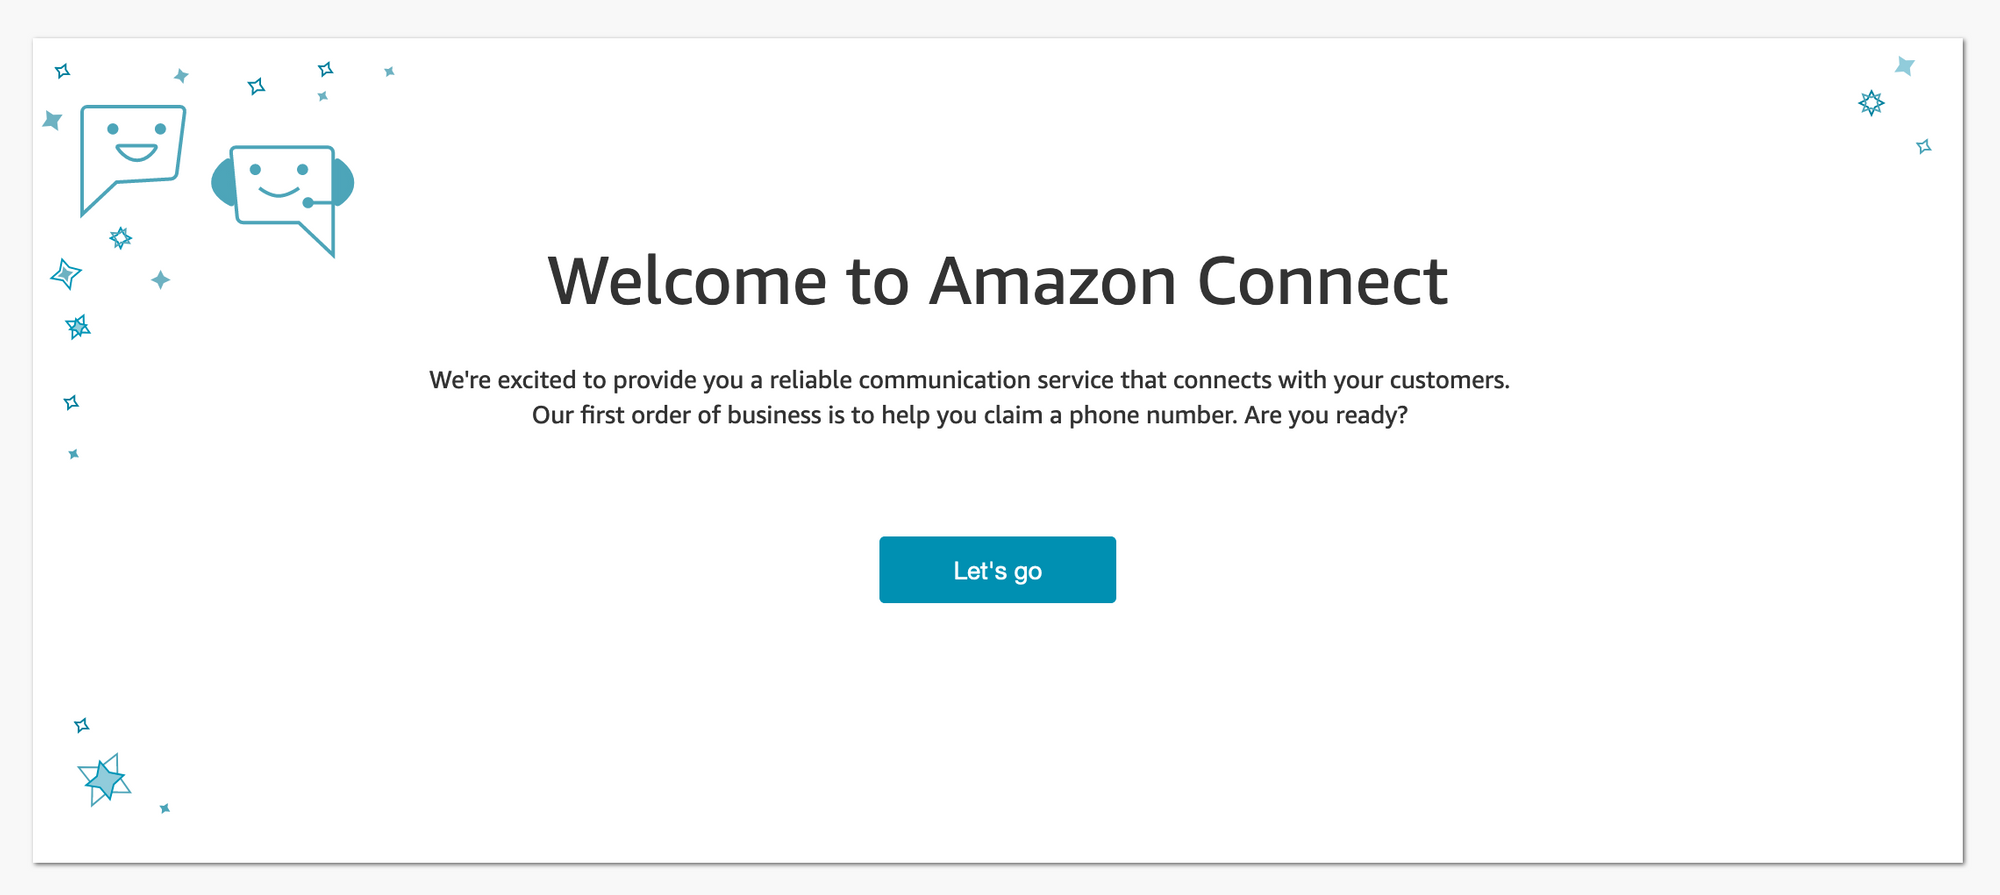
Ok we’re now logged into our Amazon Connect instance, time for some configuration!
Conversational AI - AWS Connect, Lambda, DynamoDb, S3, Node.js, ReactJS, Axios & Bootstrap 4
Firstly, we need to claim a phone number to allow our customers to communicate with us!

Conversational AI - AWS Connect, Lambda, DynamoDb, S3, Node.js, ReactJS, Axios & Bootstrap 4
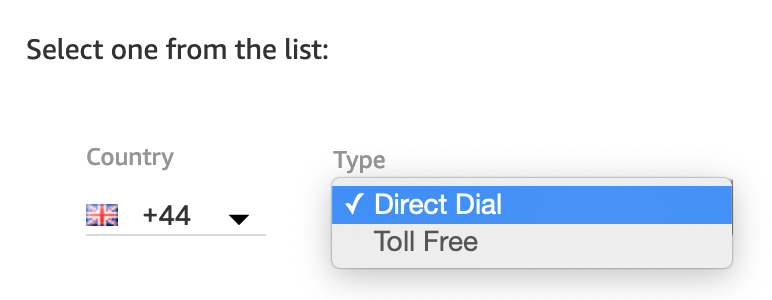
We can either make the customer pay for it, or choose a toll free number (which ultimately costs us more as a business, but benefits the customer more).
Conversational AI - AWS Connect, Lambda, DynamoDb, S3, Node.js, ReactJS, Axios & Bootstrap 4
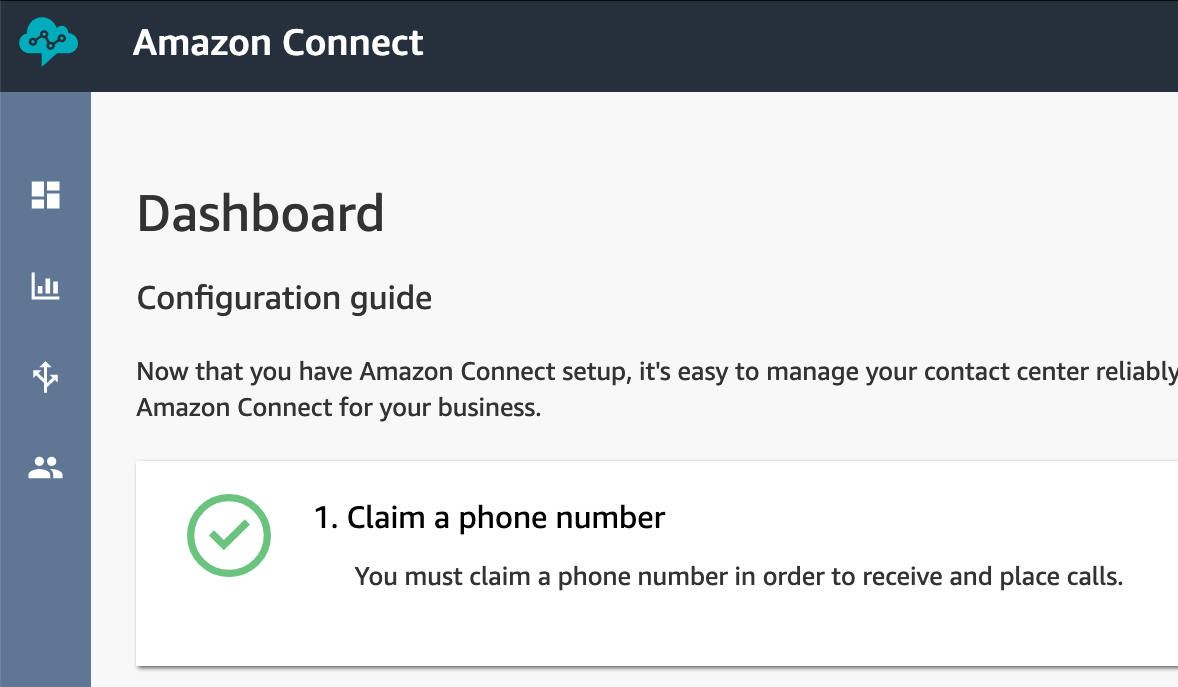
Ok, now that we have a phone number claimed, we can start to develop our conversational artificial intelligence service.
Conversational AI - AWS Connect, Lambda, DynamoDb, S3, Node.js, ReactJS, Axios & Bootstrap 4
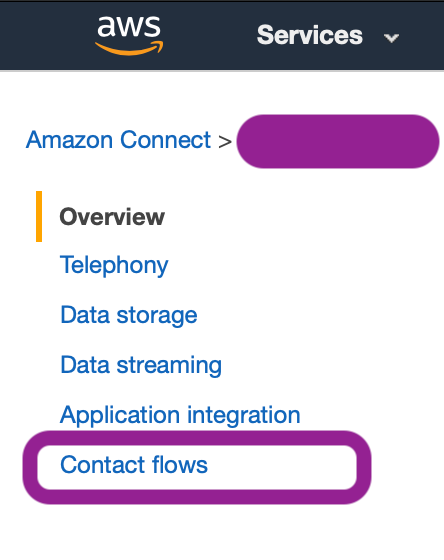
Before we begin, head back to the Amazon Connect section of your AWS Console, as we need to give Amazon Connect access to our Lambda functions.
Conversational AI - AWS Connect, Lambda, DynamoDb, S3, Node.js, ReactJS, Axios & Bootstrap 4
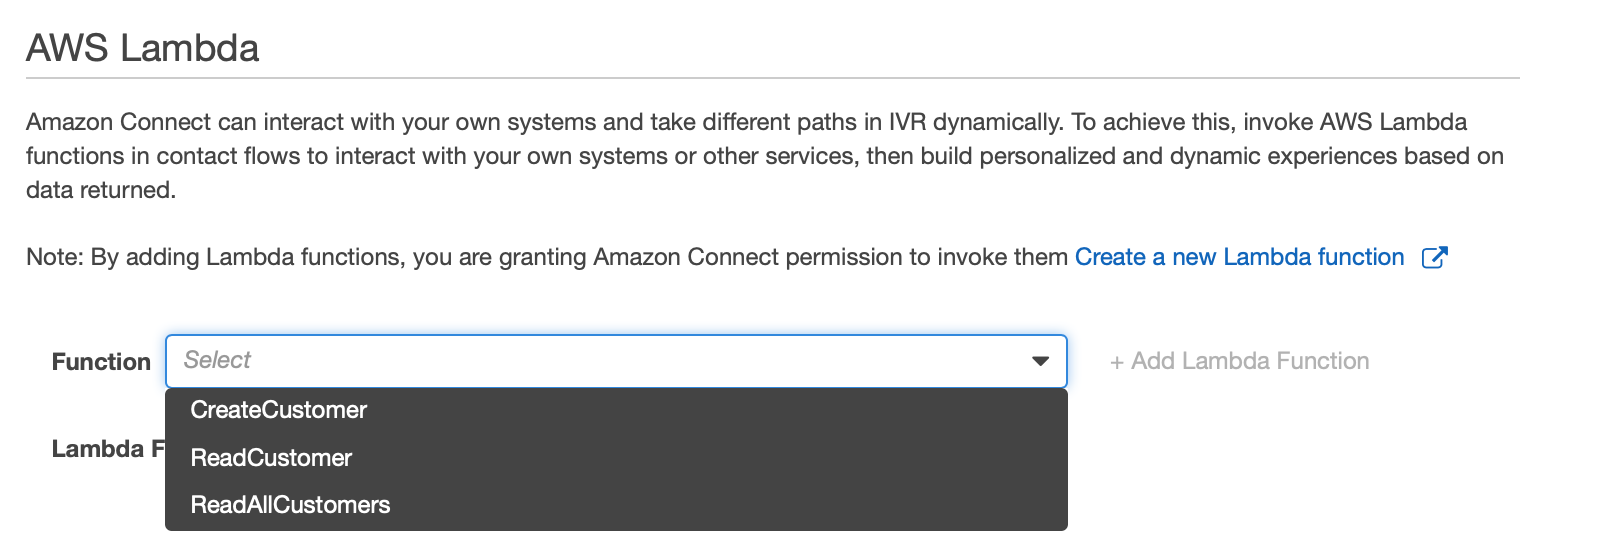
Click the “Contact flows” option, and then scroll down to the AWS Lambda section.
Conversational AI - AWS Connect, Lambda, DynamoDb, S3, Node.js, ReactJS, Axios & Bootstrap 4
As you can see, we have the option add all three of our Lambda functions to our Amazon Connect instance. In this case we only want to make the “ReadCustomer” function available to Amazon Connect.

Conversational AI - AWS Connect, Lambda, DynamoDb, S3, Node.js, ReactJS, Axios & Bootstrap 4
Ok great, now that’s been configured, let’s head back to our Amazon Connect instance’s dashboard.
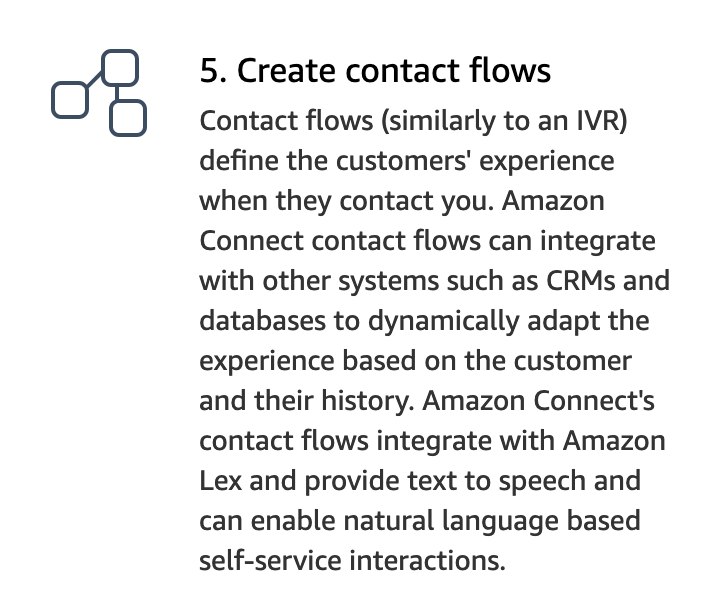
Choose the “Create contact flows” option from the dashboard page of your Amazon Connect instance.
Conversational AI - AWS Connect, Lambda, DynamoDb, S3, Node.js, ReactJS, Axios & Bootstrap 4
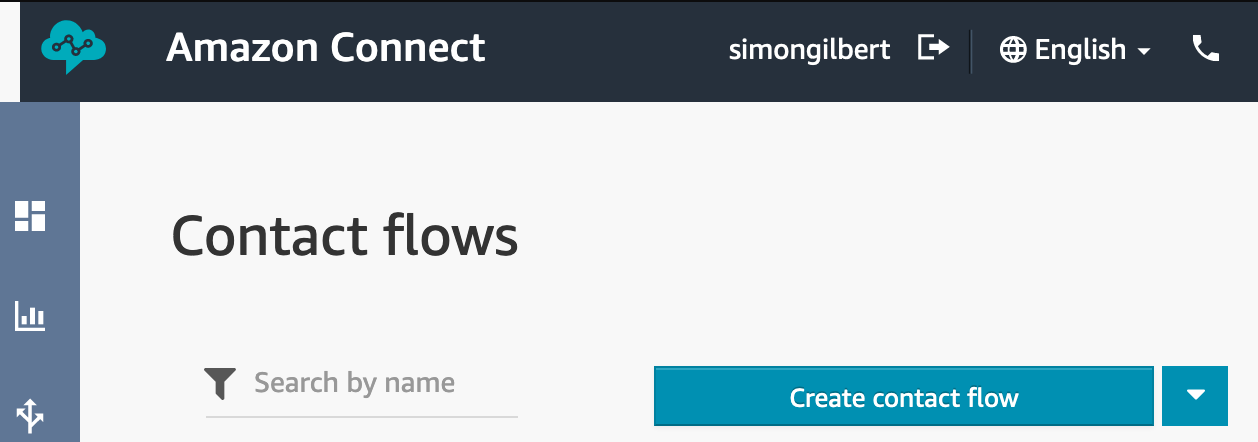
Next, choose “Create Contact Flow”.
Conversational AI - AWS Connect, Lambda, DynamoDb, S3, Node.js, ReactJS, Axios & Bootstrap 4
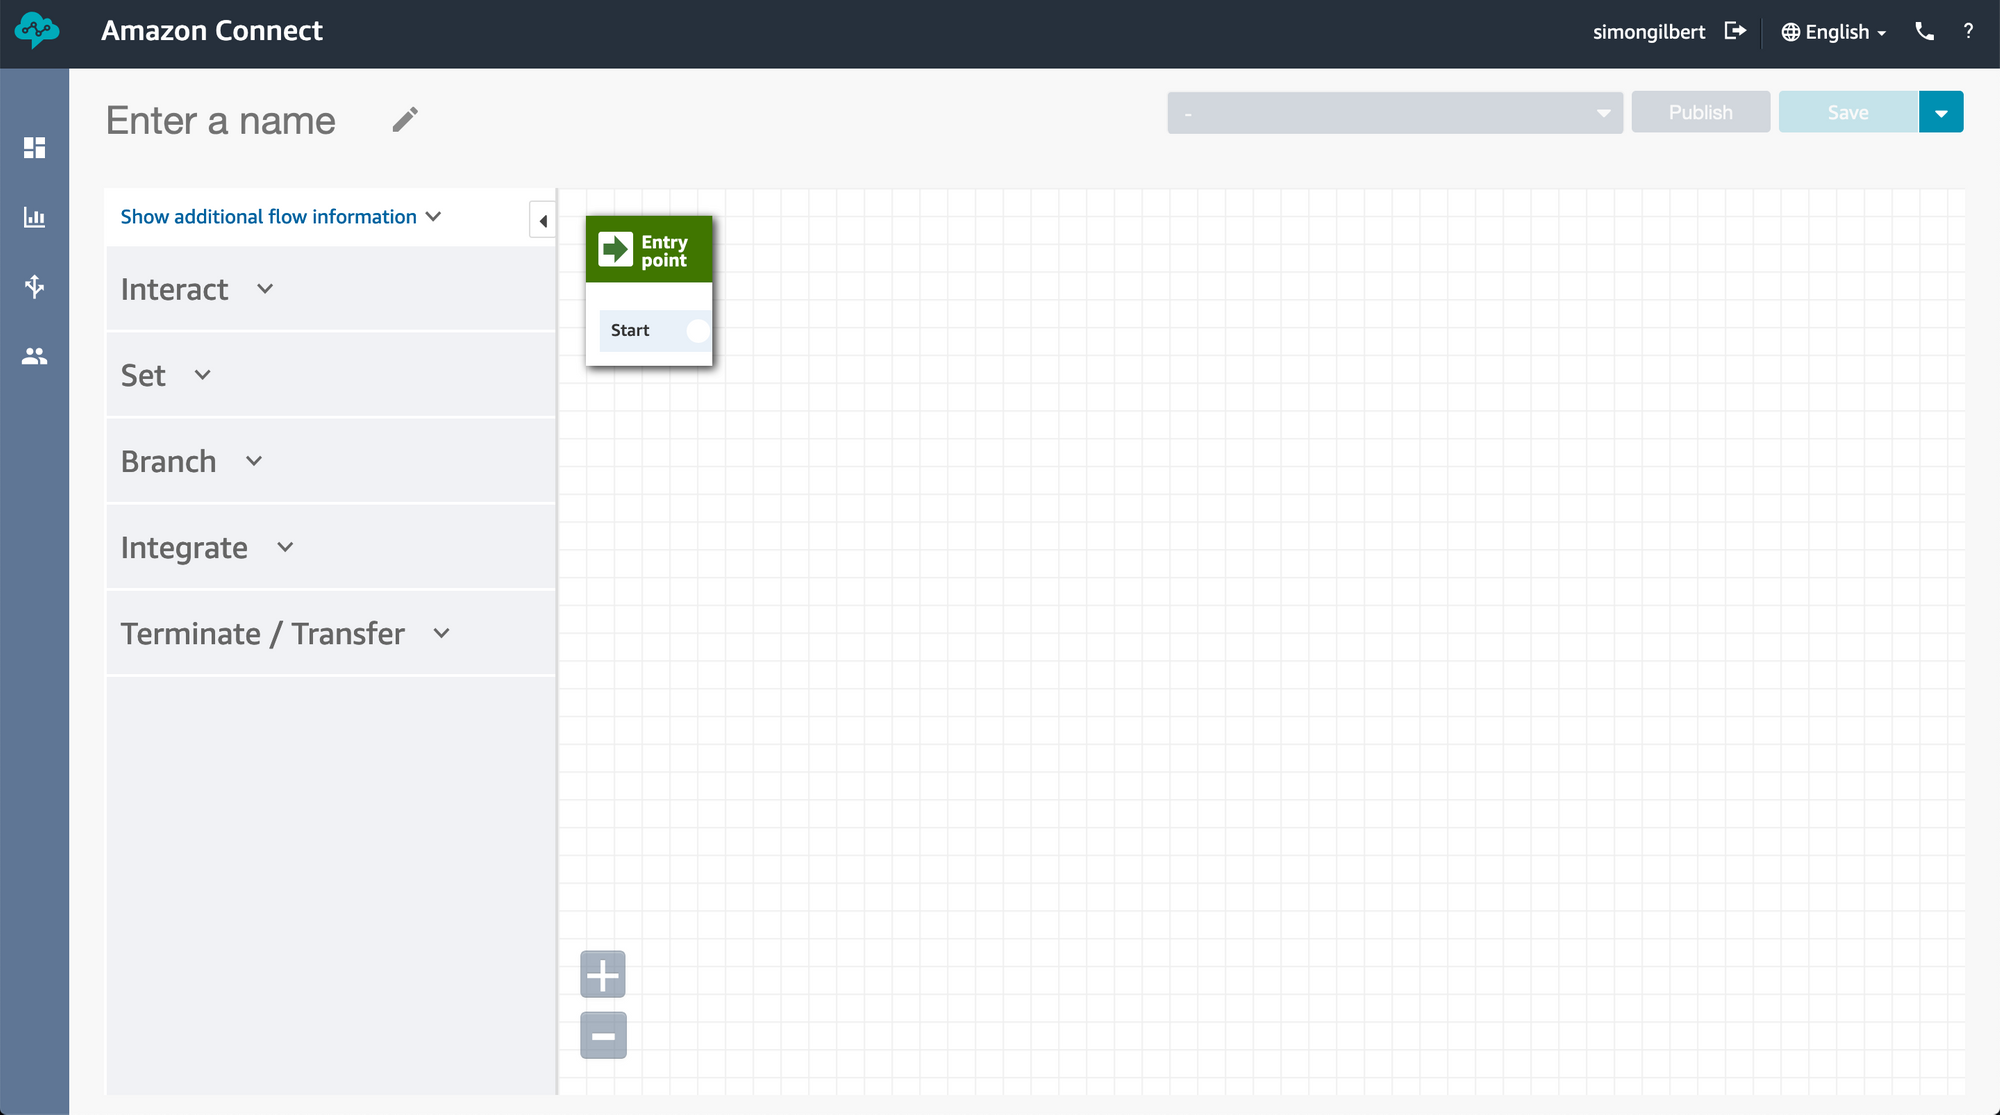
You will then see a blank contact flow page, which gives us the option to configure our conversational artificial intelligence flow.
Conversational AI - AWS Connect, Lambda, DynamoDb, S3, Node.js, ReactJS, Axios & Bootstrap 4
Let the fun begin!! From the left-hand menu, let’s start by adding a “play prompt” and connecting it to our entry point. This is going to be the greeting for our customers, to explain to them what this phone line does, and the service that it provides to them free of charge.
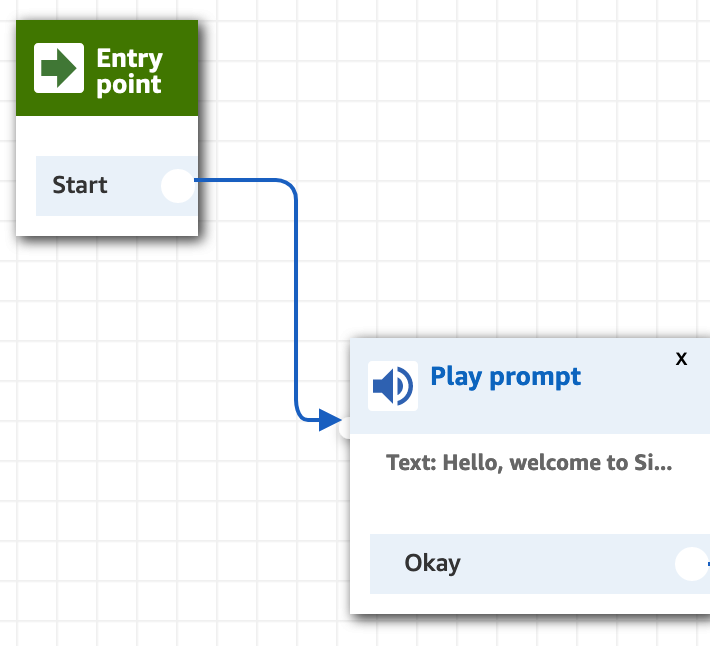
Conversational AI - AWS Connect, Lambda, DynamoDb, S3, Node.js, ReactJS, Axios & Bootstrap 4
As you can see, I’ve added some welcome text using text-to-speech.
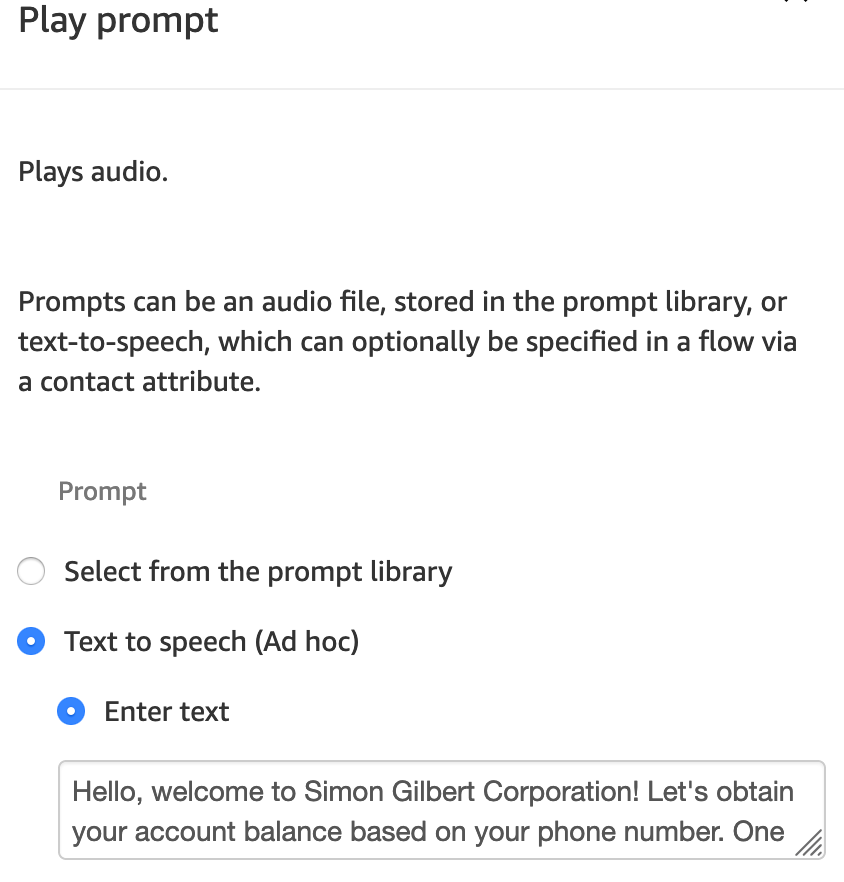
Conversational AI - AWS Connect, Lambda, DynamoDb, S3, Node.js, ReactJS, Axios & Bootstrap 4
Next, we need to link this prompt to our AWS Lambda Function by adding an “Invoke AWS Lambda function” step next.
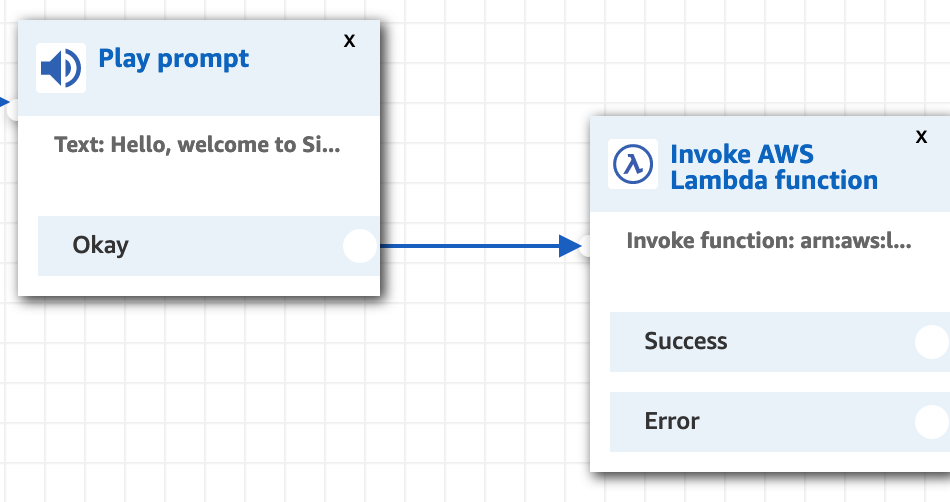
Conversational AI - AWS Connect, Lambda, DynamoDb, S3, Node.js, ReactJS, Axios & Bootstrap 4
Be sure to choose the “Read Customer” Lambda function that we made available to Amazon Connect earlier.
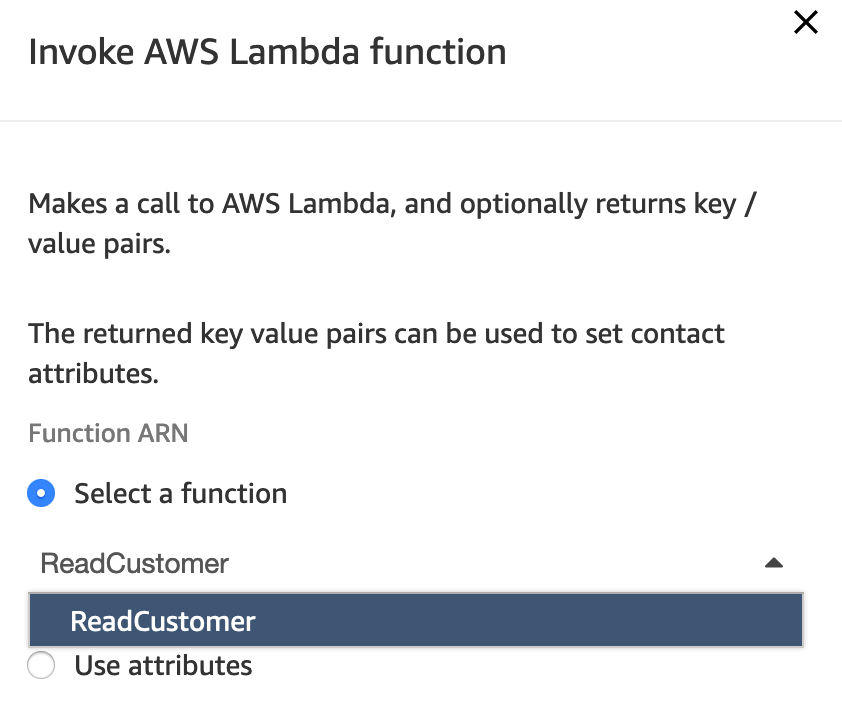
Conversational AI - AWS Connect, Lambda, DynamoDb, S3, Node.js, ReactJS, Axios & Bootstrap 4
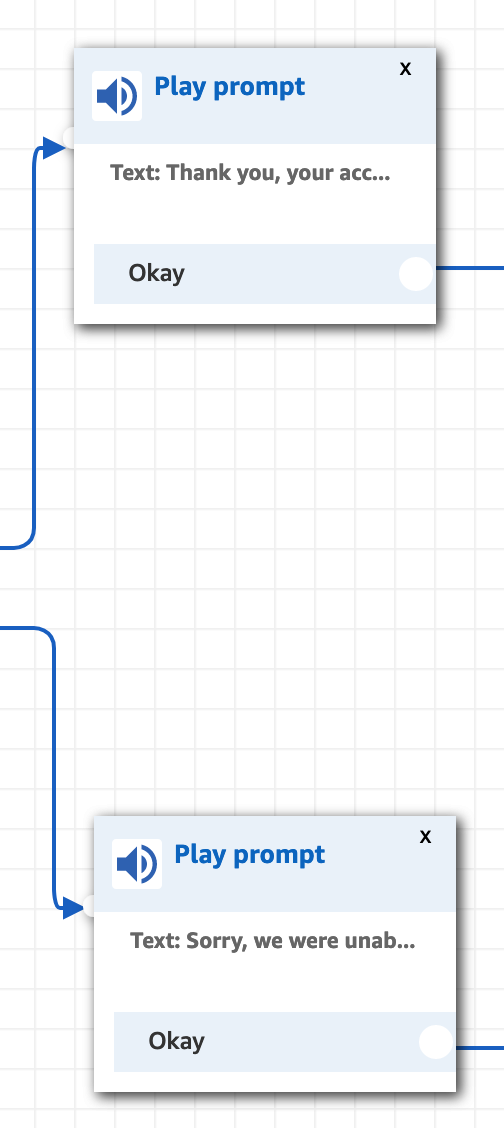
Now to add a “play prompt” for both our success and failure outputs from our “Invoke AWS Lambda function” step.
Conversational AI - AWS Connect, Lambda, DynamoDb, S3, Node.js, ReactJS, Axios & Bootstrap 4
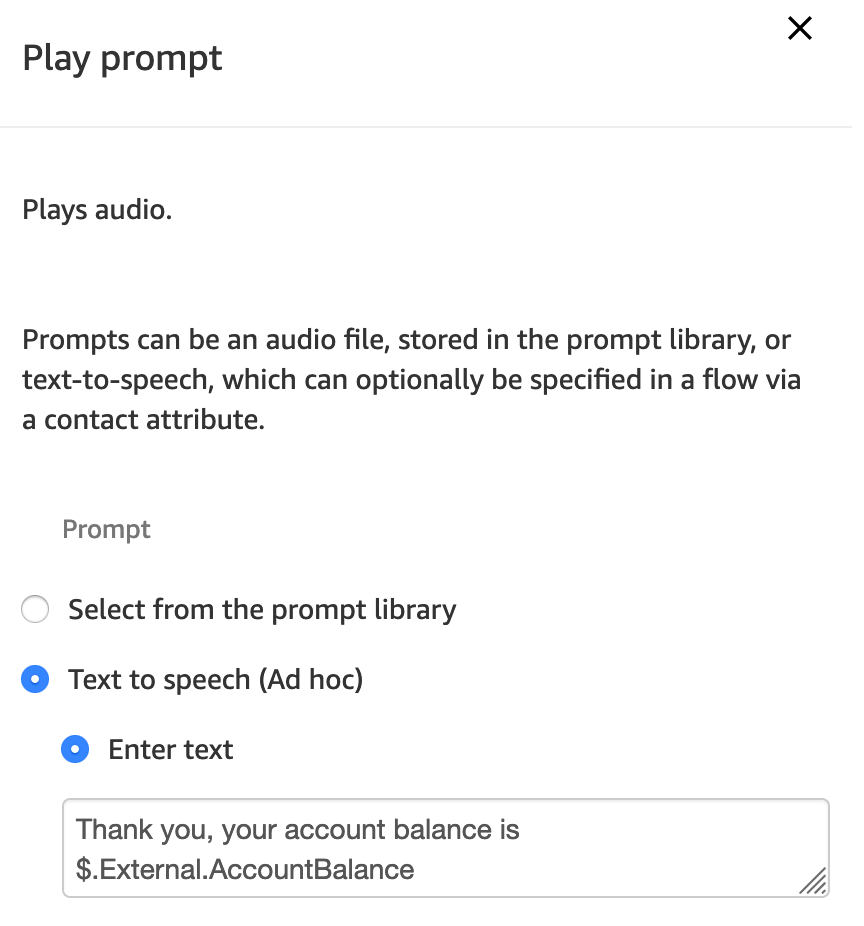
For our success message, we need to handle the happy path return value from our AWS Lambda function, which returns a property that we named “AccountBalance” (the result we got back from our Lambda function test that was executed previously).
Conversational AI - AWS Connect, Lambda, DynamoDb, S3, Node.js, ReactJS, Axios & Bootstrap 4
You will note that the prefix for the property name is $.External. (which is used for all properties that are external to Amazon Connect, albeit accessible). This property holds our return data, and is being injected into our text-to-speech function, allowing the value to be read out to the caller as part of the process flow.
For our error result from invoking the Lambda, let’s simply present a happy sorry message.

Conversational AI - AWS Connect, Lambda, DynamoDb, S3, Node.js, ReactJS, Axios & Bootstrap 4
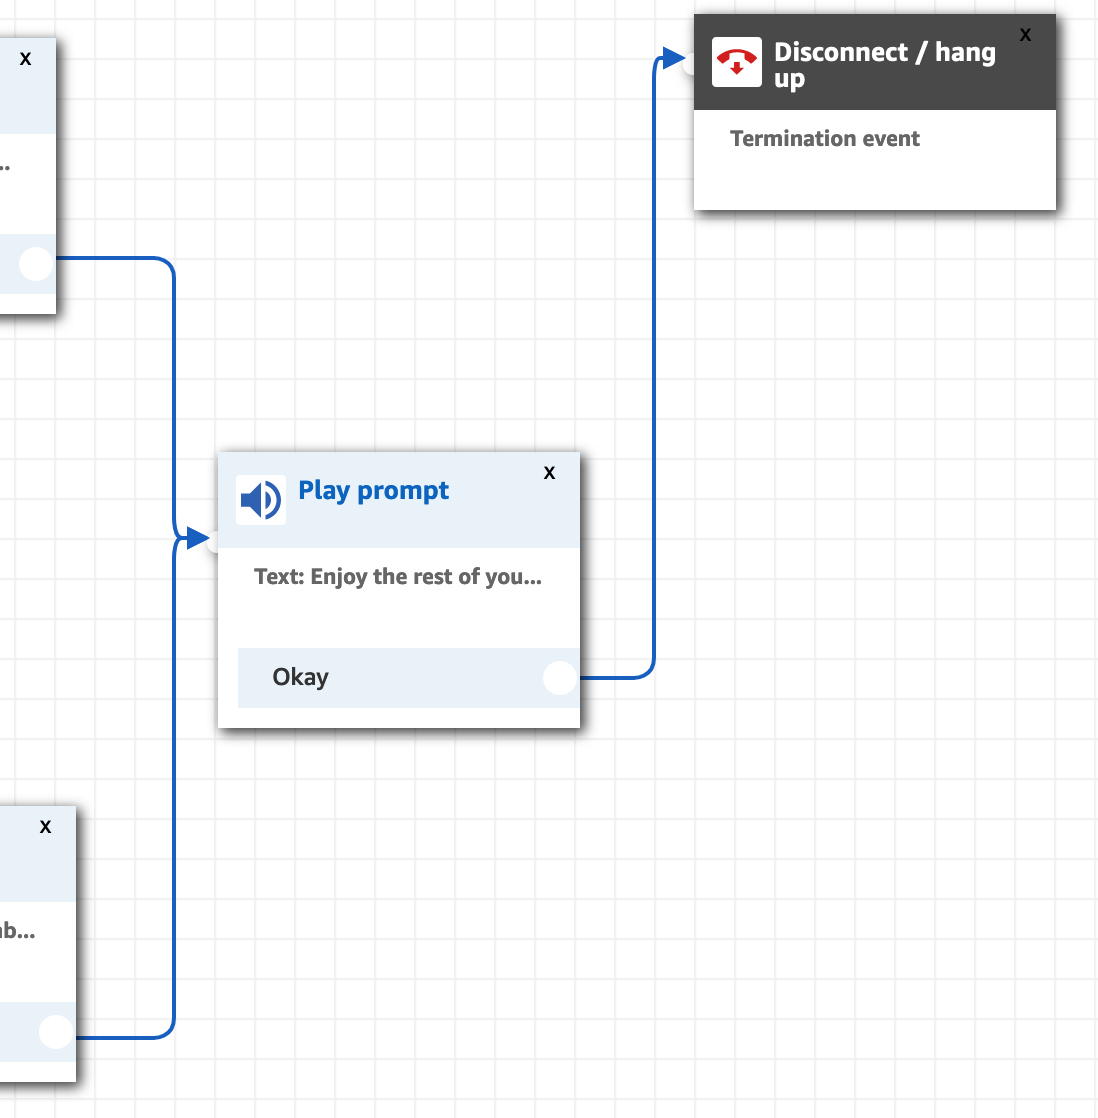
Following this, let’s round the call off with another play prompt to say goodbye, followed by a termination event to end the phone call.
Conversational AI - AWS Connect, Lambda, DynamoDb, S3, Node.js, ReactJS, Axios & Bootstrap 4
Our goodbye text-to-speech message looks as follows.

Conversational AI - AWS Connect, Lambda, DynamoDb, S3, Node.js, ReactJS, Axios & Bootstrap 4
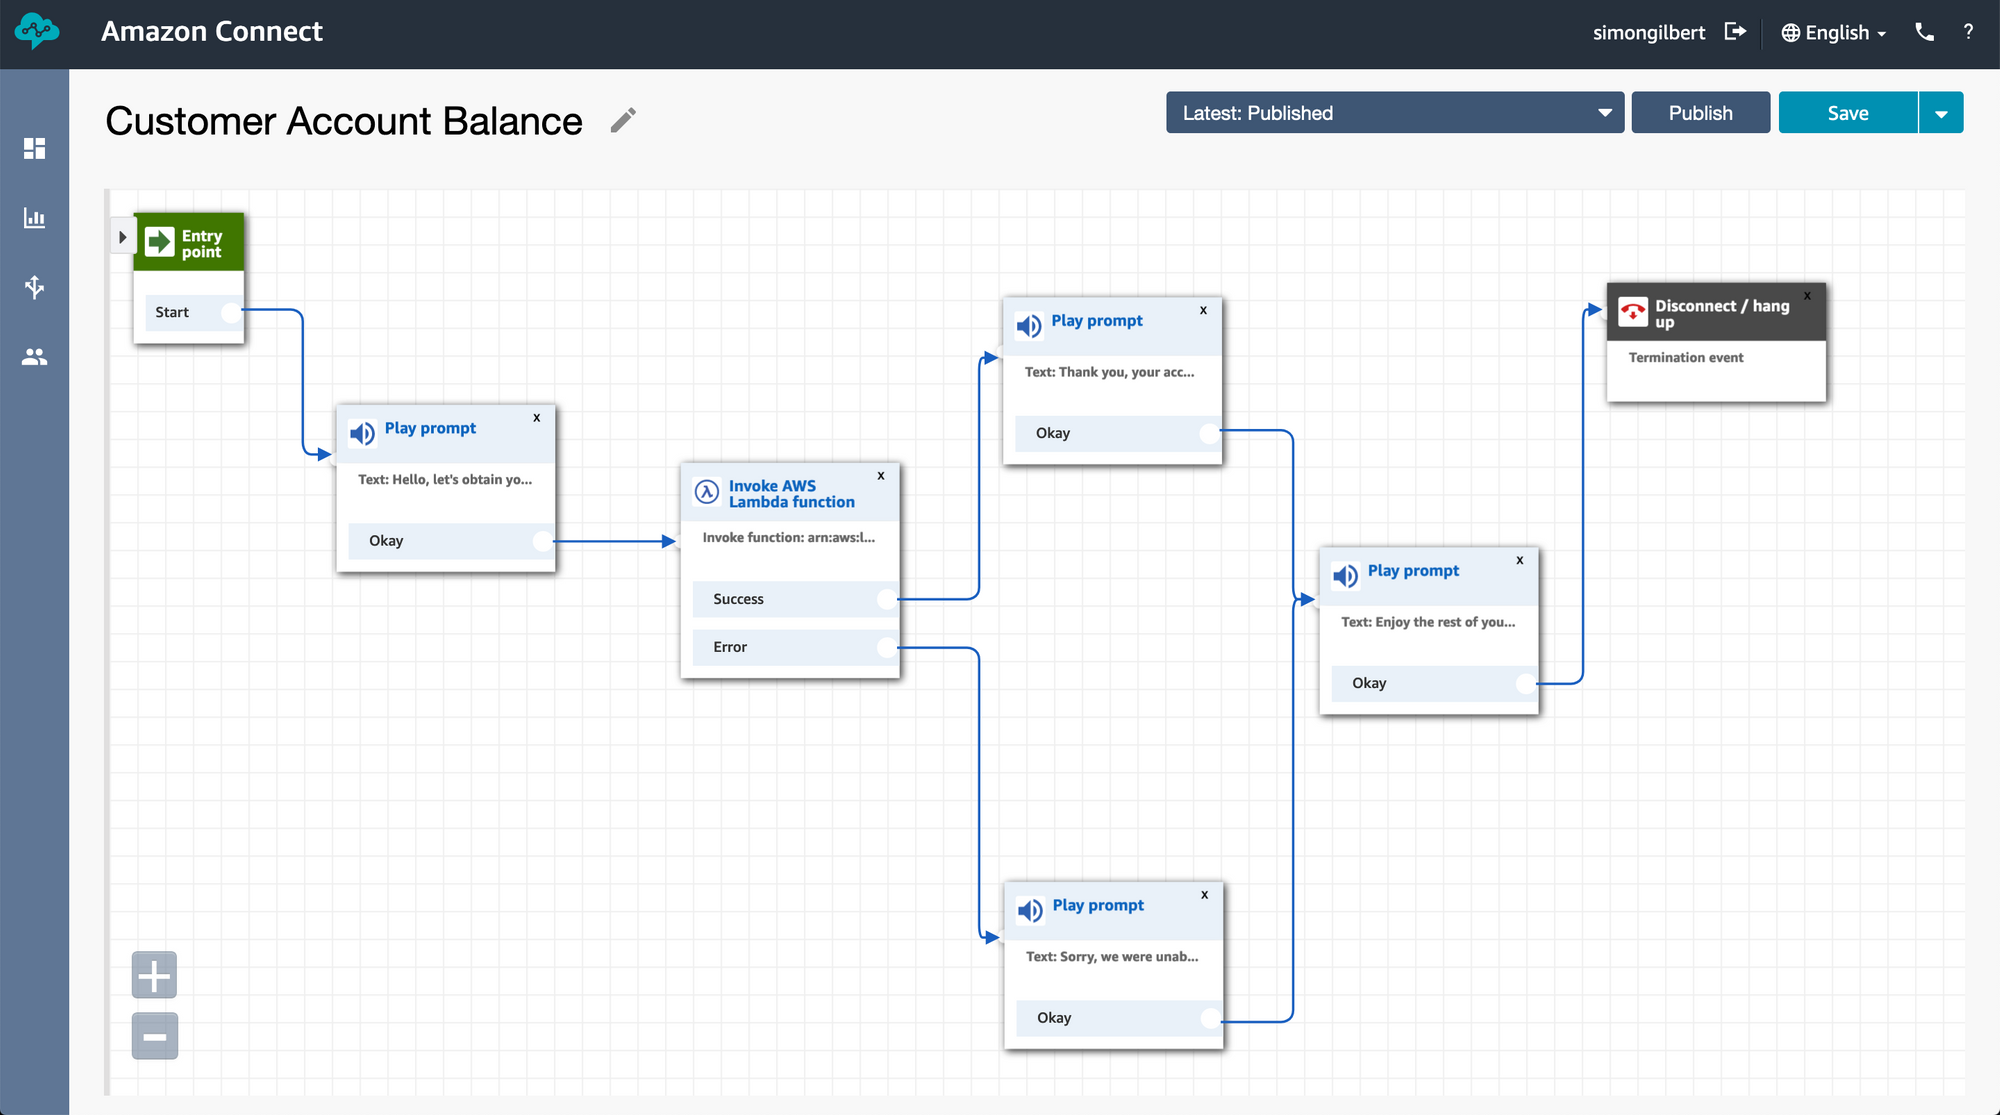
Finally, our conversational artificial intelligence contact flow should look as follows. Save and publish the contact flow, and let’s bind it to the toll free phone number we claimed for our Amazon Connect instance.
Conversational AI - AWS Connect, Lambda, DynamoDb, S3, Node.js, ReactJS, Axios & Bootstrap 4
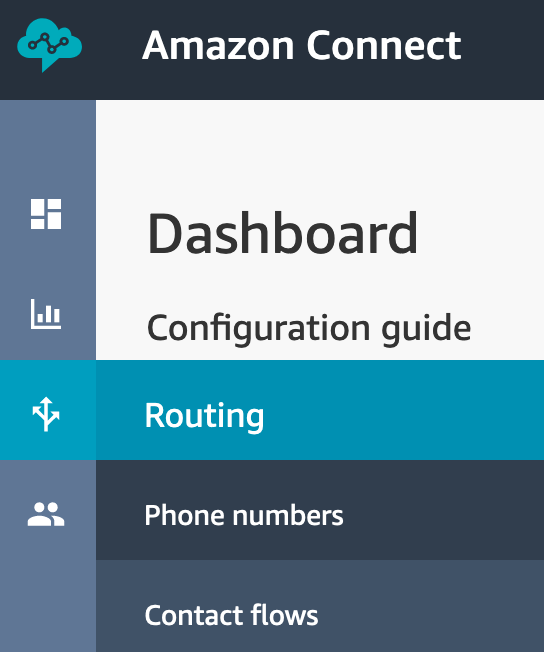
Now that our contact flow is saved and published, we need to bind it to our claimed phone number. In the main dashboard menu, choose “phone numbers”.
Conversational AI - AWS Connect, Lambda, DynamoDb, S3, Node.js, ReactJS, Axios & Bootstrap 4
Here you can see the number we claimed. Click on it and assign our newly created contact flow to the phone number as follows.

Conversational AI - AWS Connect, Lambda, DynamoDb, S3, Node.js, ReactJS, Axios & Bootstrap 4
Ok, at this point feel free to add your phone number and an account balance to your DynamoDb database and then give the phone number a ring. You’re about to enjoy a fully automated process flow using conversational artificial intelligence!
AWS Api Gateway
Time to expose our serverless Lambda functions through AWS Api Gateway and build a simple front-end website to view our customer database.
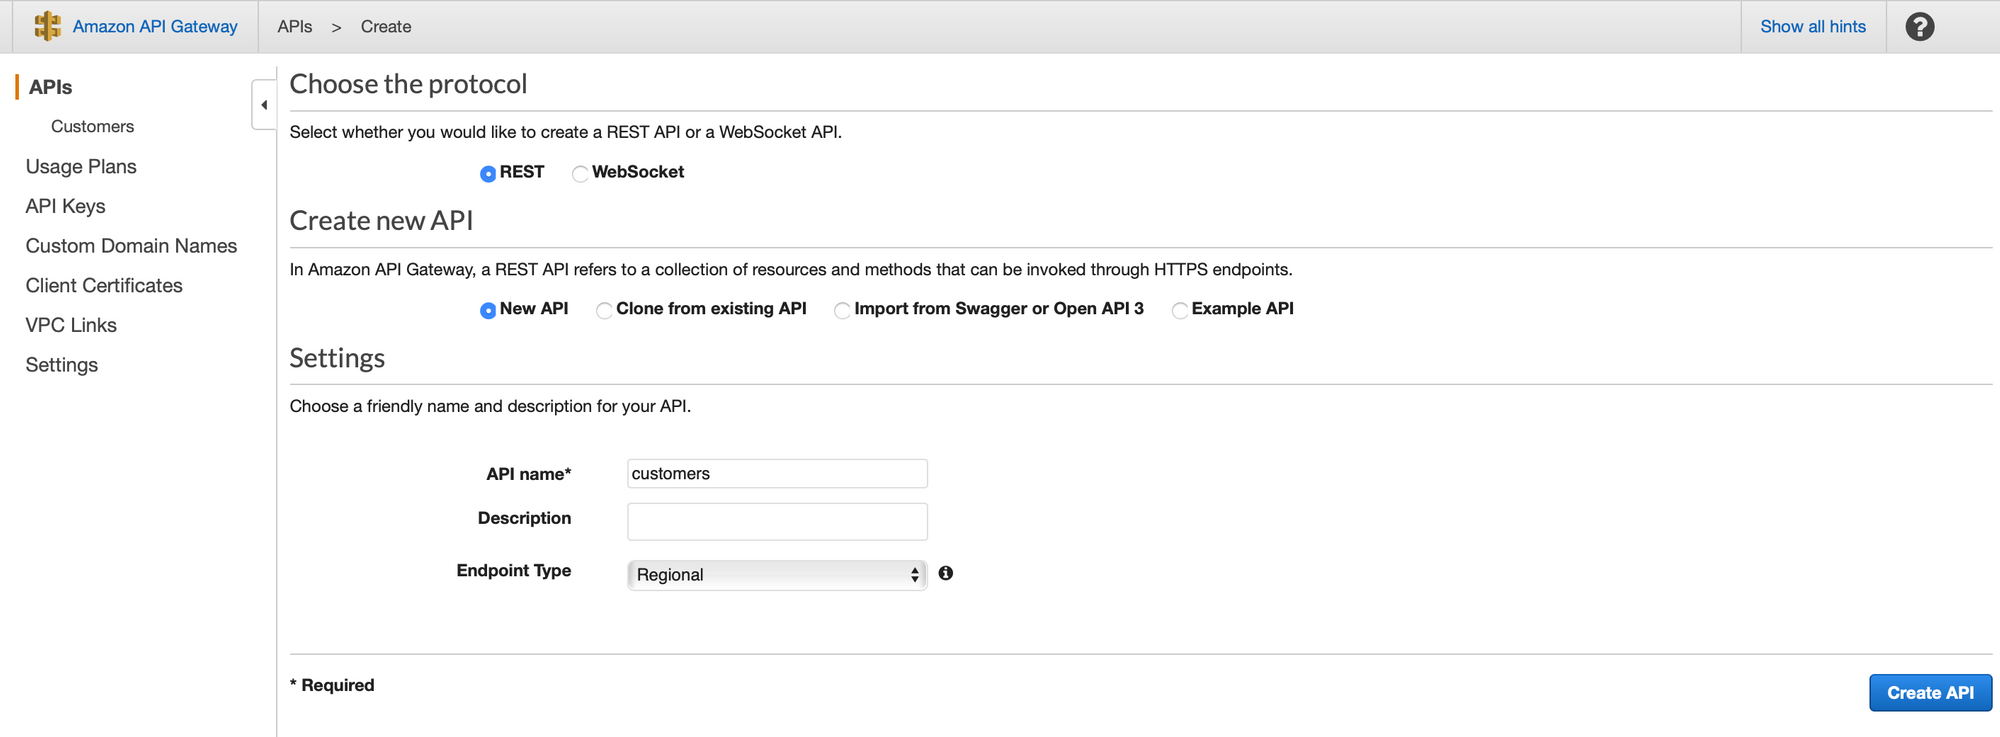
Let’s create a new API called “customers”.
Conversational AI - AWS Connect, Lambda, DynamoDb, S3, Node.js, ReactJS, Axios & Bootstrap 4
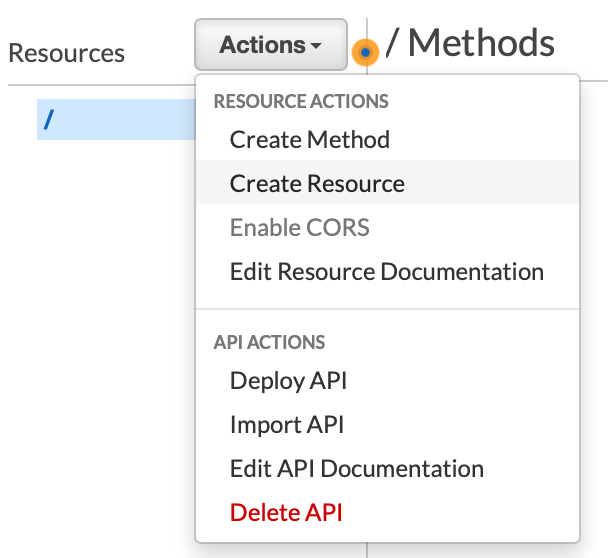
Next, let’s create a resource.
Conversational AI - AWS Connect, Lambda, DynamoDb, S3, Node.js, ReactJS, Axios & Bootstrap 4
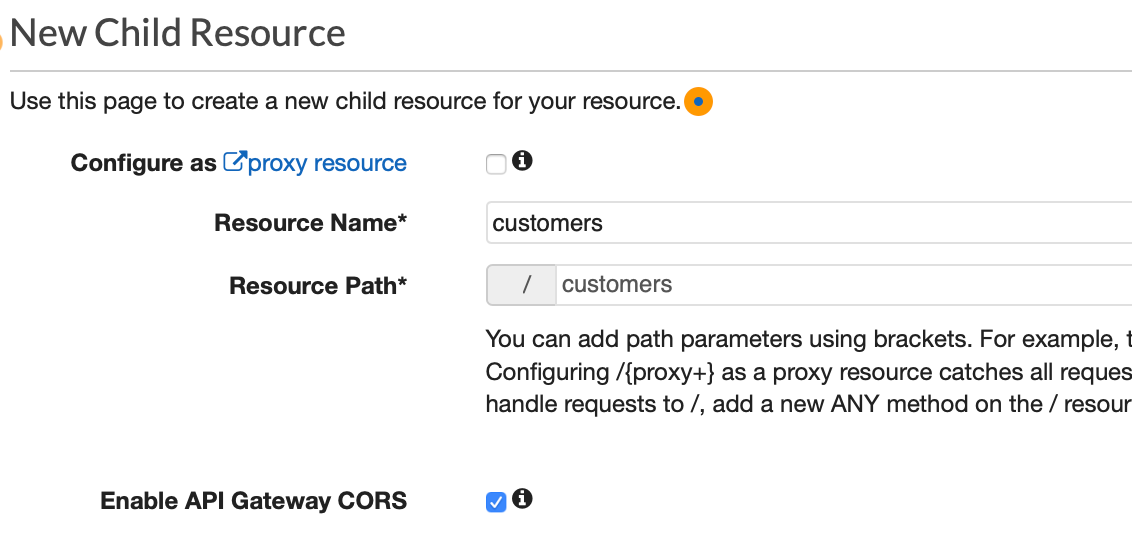
Upon clicking this option, we can add a name and a path for our resource that is relevant.
Be sure to enable CORS at this point.
Conversational AI - AWS Connect, Lambda, DynamoDb, S3, Node.js, ReactJS, Axios & Bootstrap 4
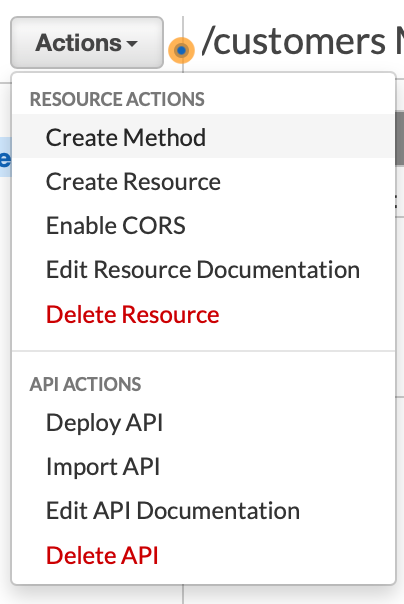
Following this, let’s create a method and expose our AWS Lambda functions via API Gateway.
Conversational AI - AWS Connect, Lambda, DynamoDb, S3, Node.js, ReactJS, Axios & Bootstrap 4
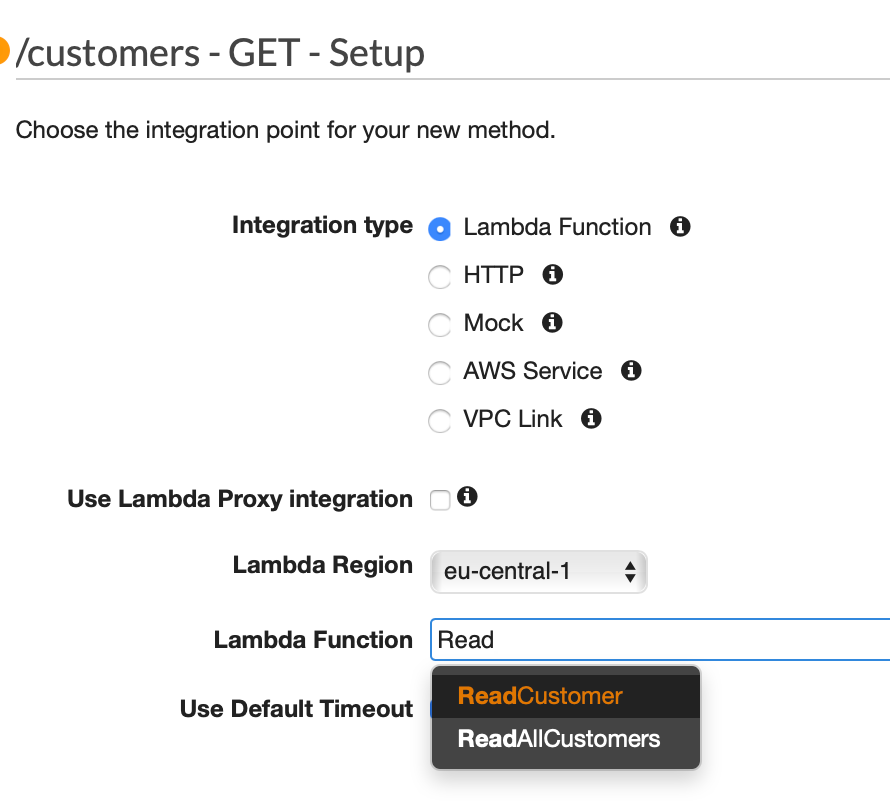
Now to expose the Lambda by choosing the relevant region and the associated Lambda.
Conversational AI - AWS Connect, Lambda, DynamoDb, S3, Node.js, ReactJS, Axios & Bootstrap 4
Confirm that you want to expose the Lambda function.

Conversational AI - AWS Connect, Lambda, DynamoDb, S3, Node.js, ReactJS, Axios & Bootstrap 4
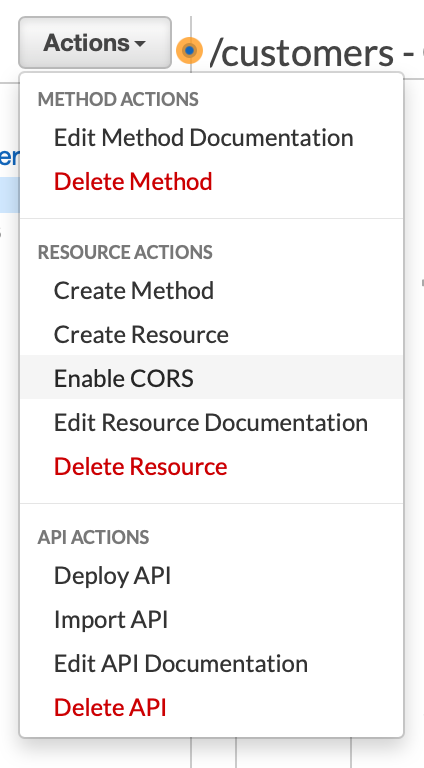
Once this is done for our Read Lambda (HTTP GET), repeat this for our Create Lambda (HTTP POST). Finally, be sure to enable CORS for the API Gateway itself.
Conversational AI - AWS Connect, Lambda, DynamoDb, S3, Node.js, ReactJS, Axios & Bootstrap 4
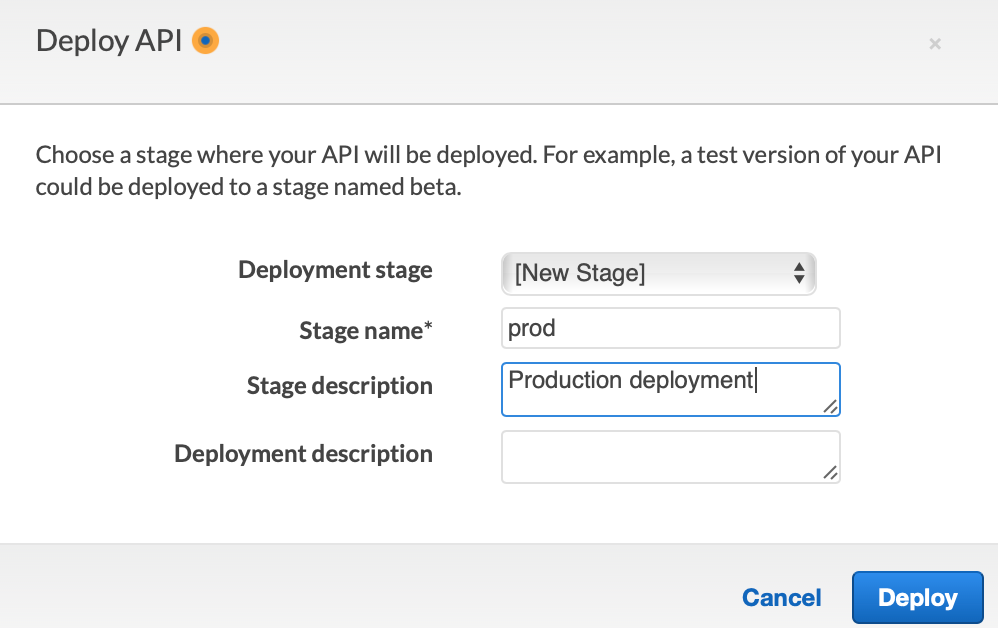
Now to deploy our API to a new staging environment.
Conversational AI - AWS Connect, Lambda, DynamoDb, S3, Node.js, ReactJS, Axios & Bootstrap 4
Let’s quickly test our Api using Postman.

Conversational AI - AWS Connect, Lambda, DynamoDb, S3, Node.js, ReactJS, Axios & Bootstrap 4
Looks good!
Front-End UI using ReactJS, Axios & BS4
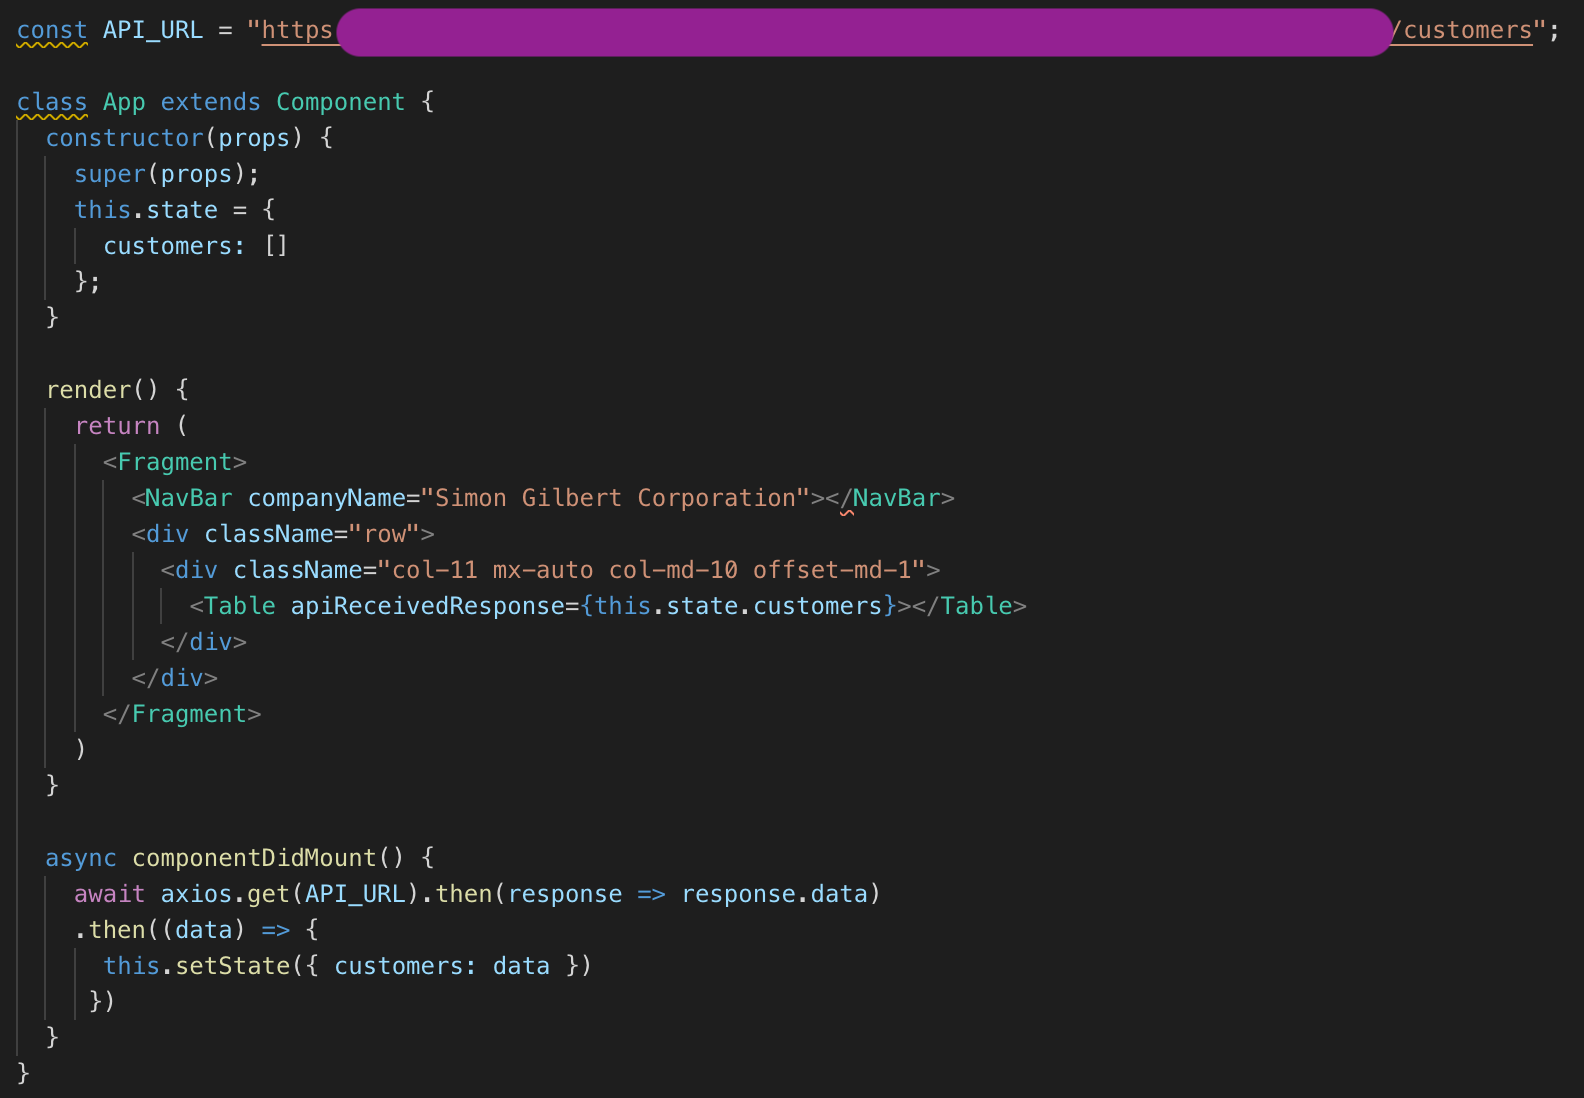
Now to build our simple front-end website to view our DynamoDb database contents. I’m not going to cover this part of the implementation in great detail. For clarity, here’s the main part of the code which calls our exposed Api and renders our customers database to the user interface.
Conversational AI - AWS Connect, Lambda, DynamoDb, S3, Node.js, ReactJS, Axios & Bootstrap 4
AWS S3 Bucket Deployment
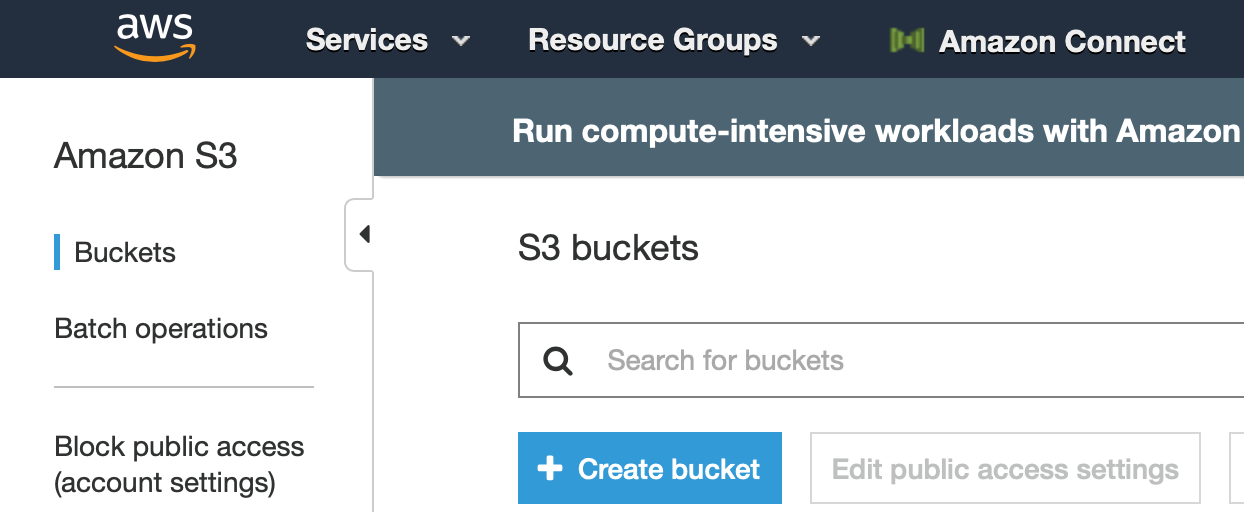
Now to deploy our ReactJS front-end to the cloud! Let’s create a new AWS S3 Bucket to deploy our code to.
Conversational AI - AWS Connect, Lambda, DynamoDb, S3, Node.js, ReactJS, Axios & Bootstrap 4
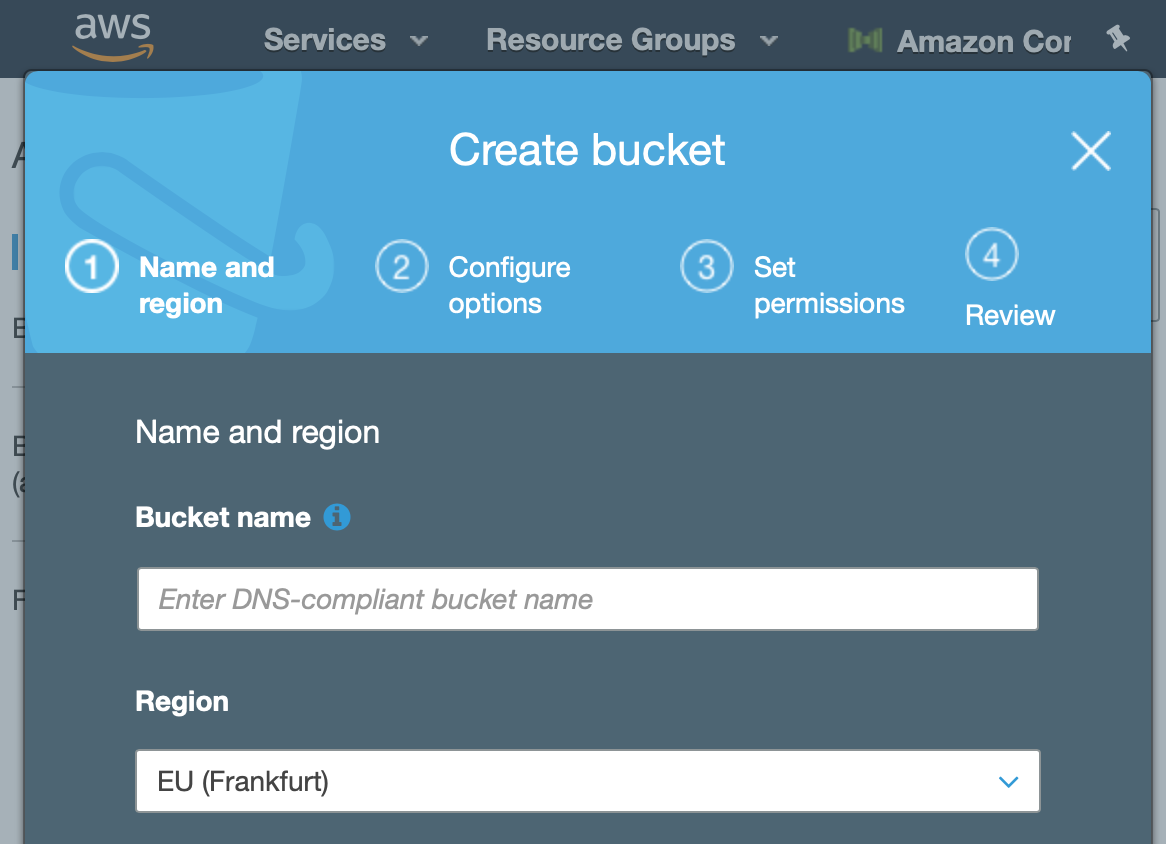
Add a bucket name and choose a region. In this case we are sticking to Frankfurt (eu-central-1), along with the rest of our stack (ease & latency etc).
Conversational AI - AWS Connect, Lambda, DynamoDb, S3, Node.js, ReactJS, Axios & Bootstrap 4
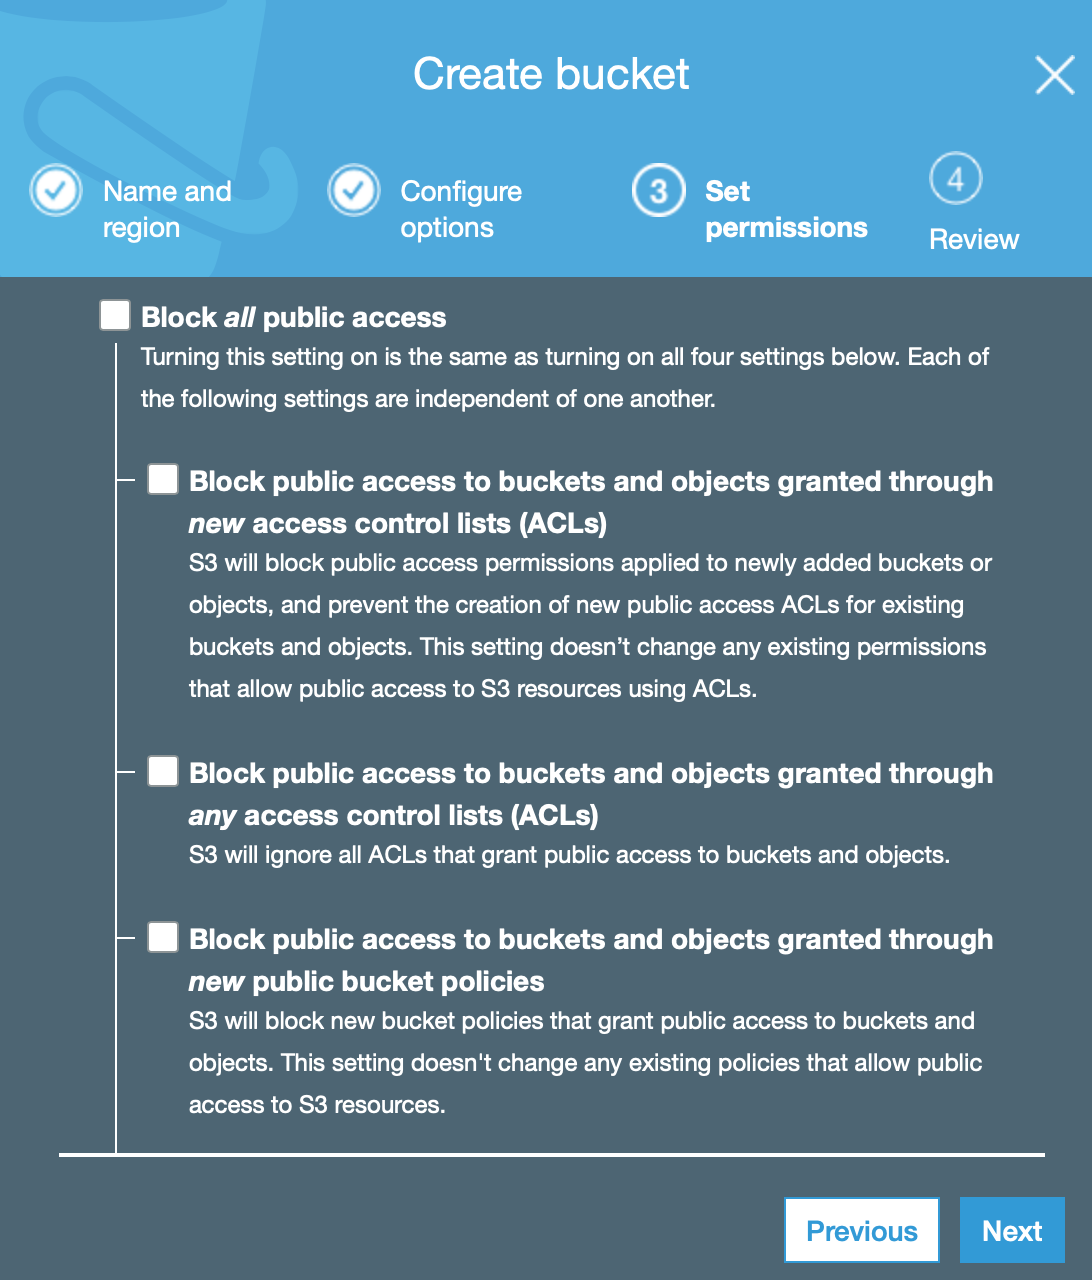
Next we need to allow public access (not great, but necessary).
Conversational AI - AWS Connect, Lambda, DynamoDb, S3, Node.js, ReactJS, Axios & Bootstrap 4
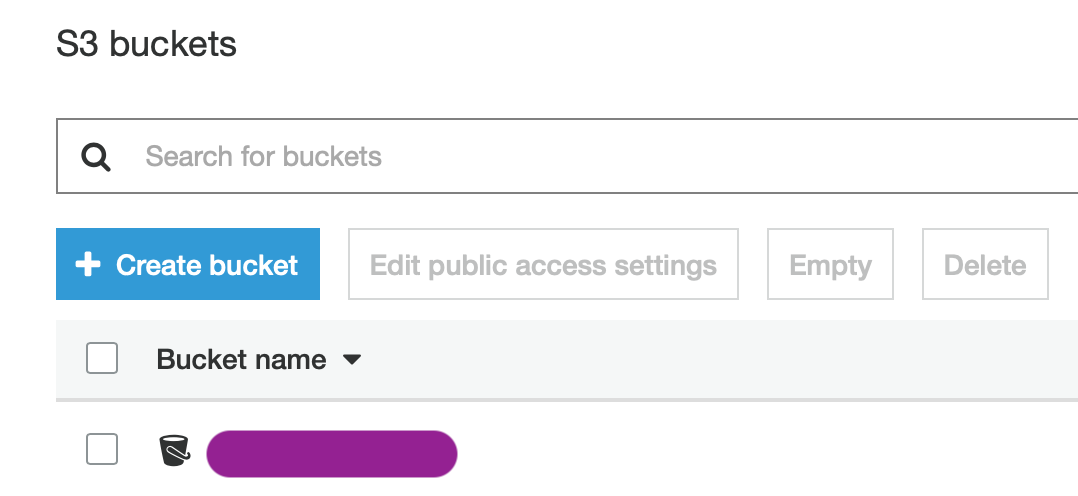
You can sail through the next steps which are straight-forward.
Conversational AI - AWS Connect, Lambda, DynamoDb, S3, Node.js, ReactJS, Axios & Bootstrap 4
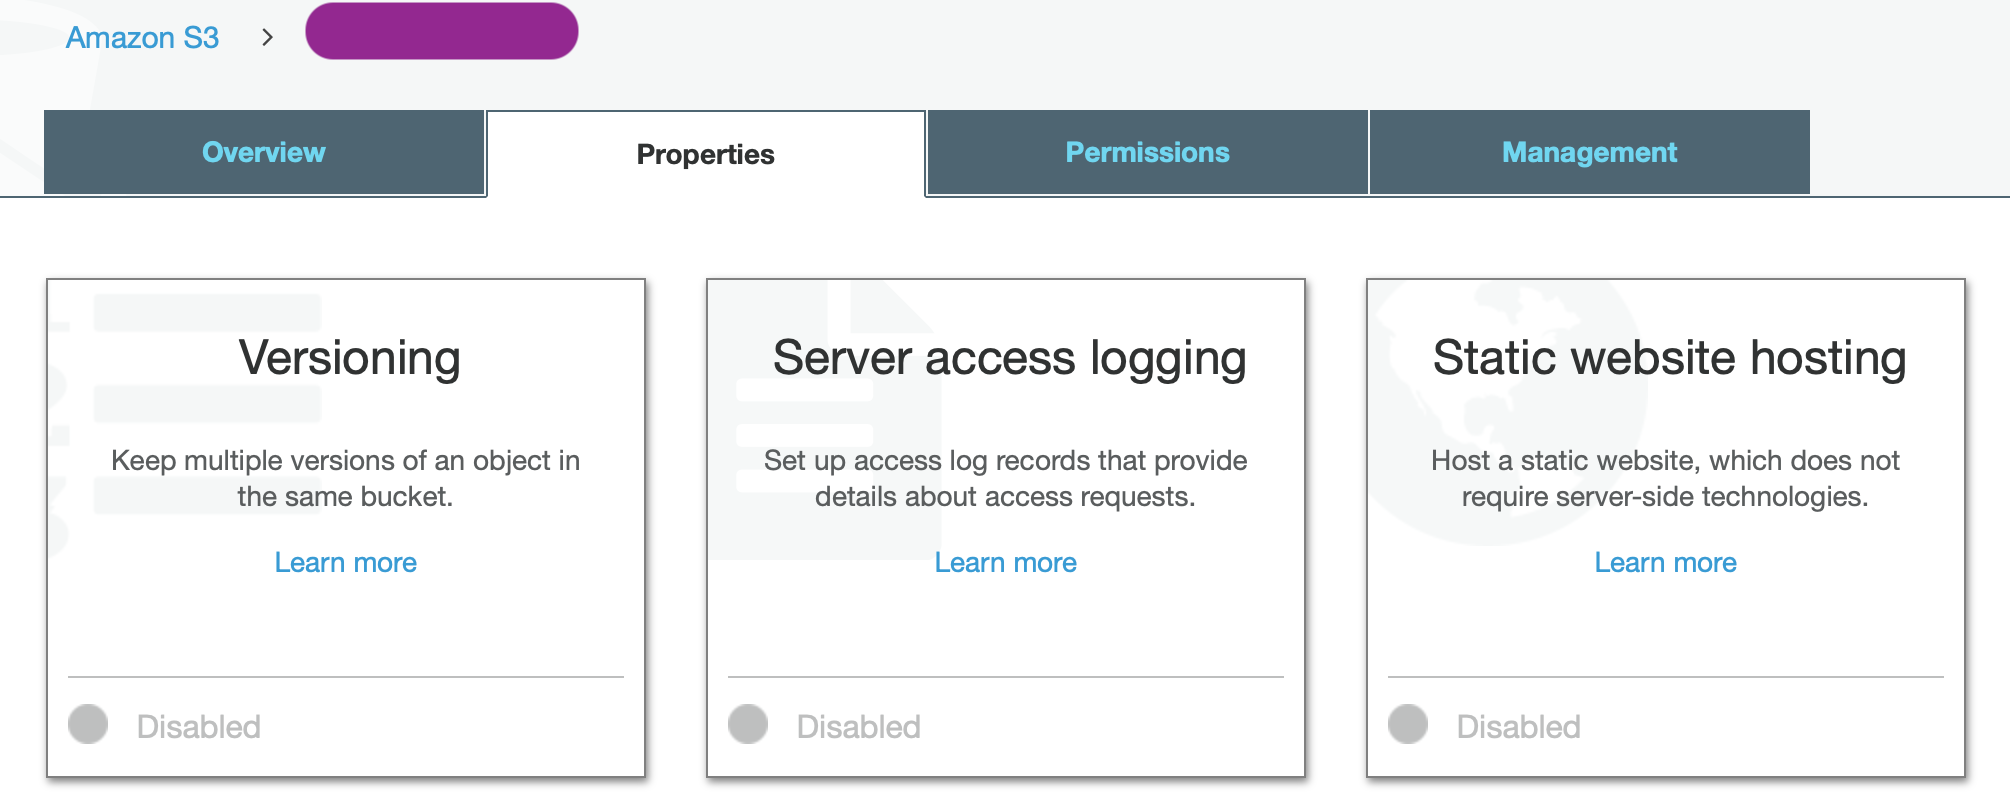
Ok now that our S3 bucket is created, click on it and we can configure it for static website hosting.
Conversational AI - AWS Connect, Lambda, DynamoDb, S3, Node.js, ReactJS, Axios & Bootstrap 4
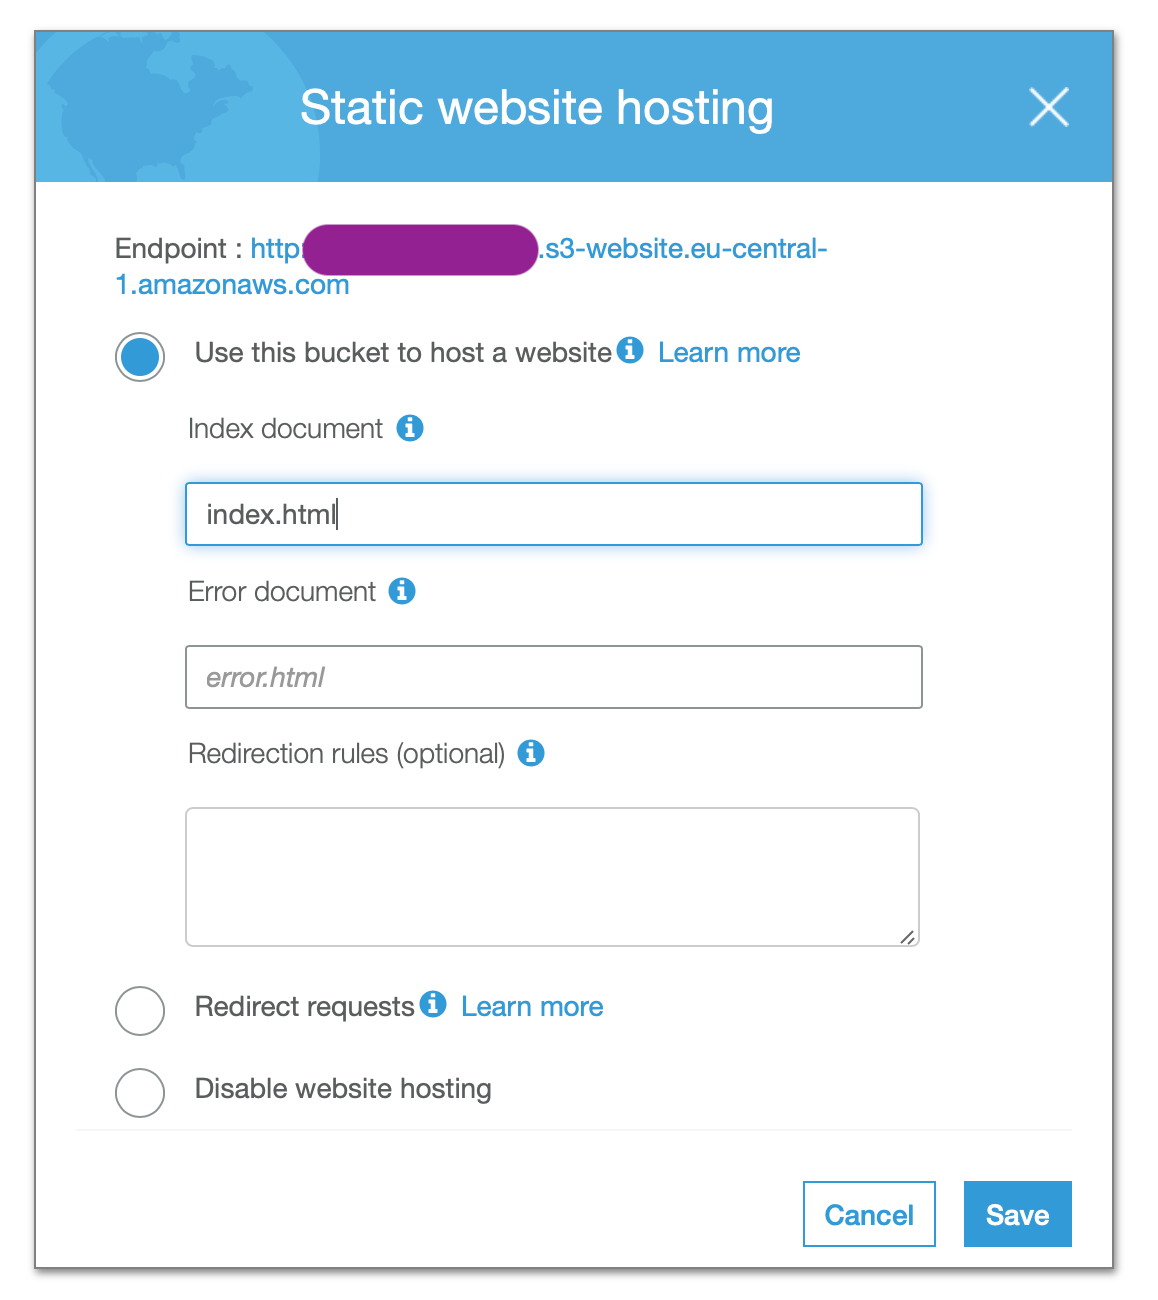
Under static website hosting, set the index document to index.html and save it**.**
Conversational AI - AWS Connect, Lambda, DynamoDb, S3, Node.js, ReactJS, Axios & Bootstrap 4
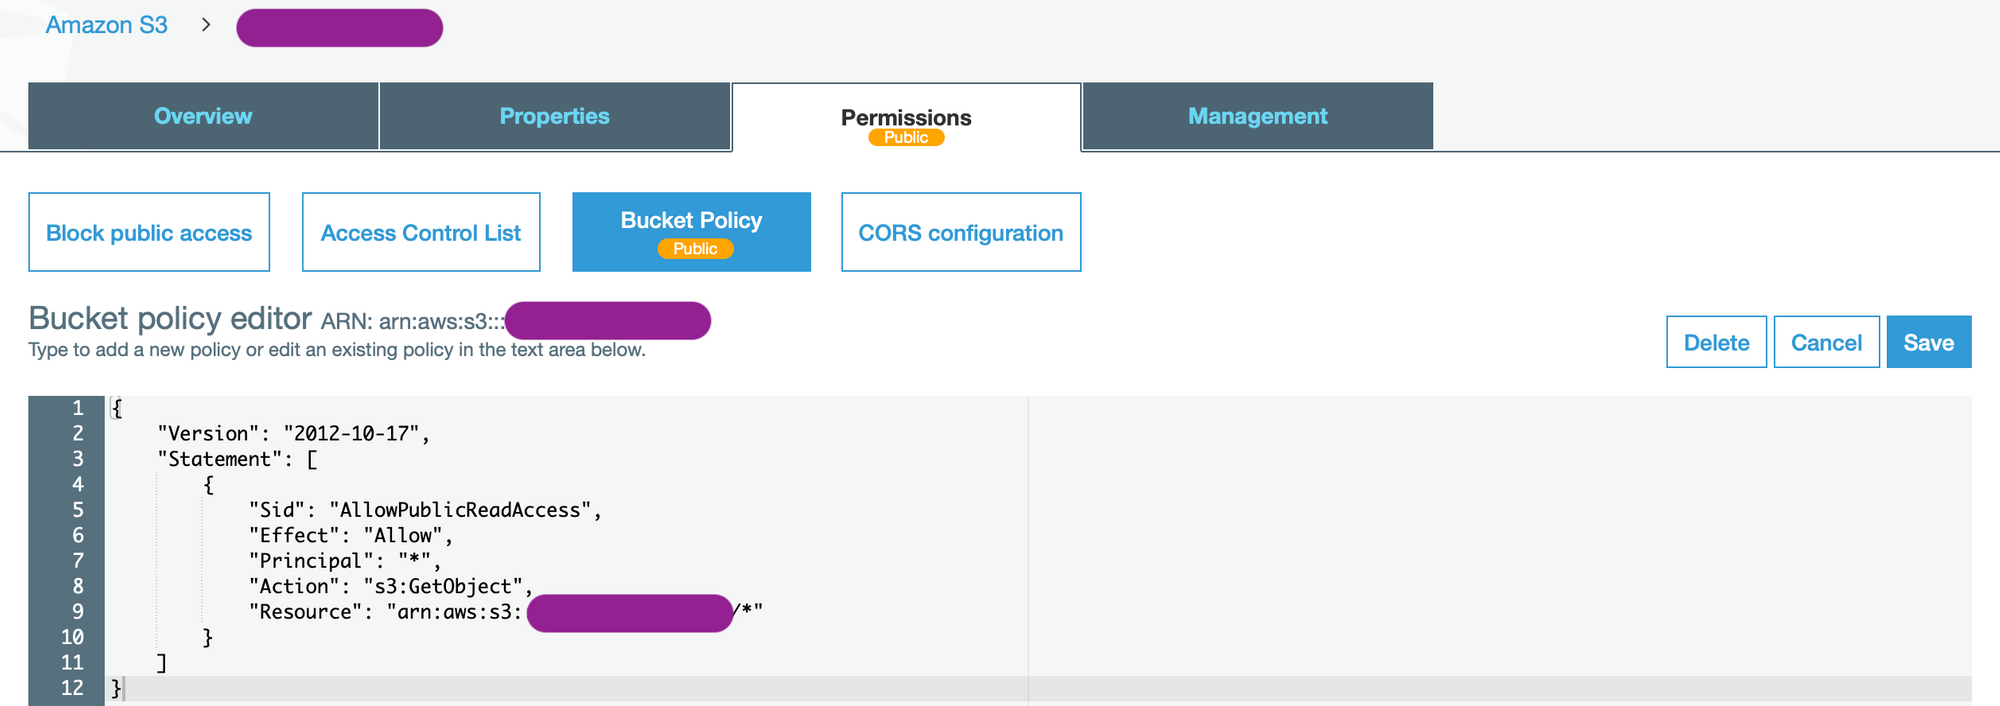
Next we need to configure the bucket policy to allow public read access.
Conversational AI - AWS Connect, Lambda, DynamoDb, S3, Node.js, ReactJS, Axios & Bootstrap 4
Ok now that’s configured, we need to install the AWS CLI in our terminal.

Conversational AI - AWS Connect, Lambda, DynamoDb, S3, Node.js, ReactJS, Axios & Bootstrap 4
Next we need to configure it using our administrator IAM Roles credentials and the relevant region we need access to.

Conversational AI - AWS Connect, Lambda, DynamoDb, S3, Node.js, ReactJS, Axios & Bootstrap 4
Now let’s head back to our ReactJS implementation and go to the packages.json file. Here, add a new statement for deployment to S3.

Conversational AI - AWS Connect, Lambda, DynamoDb, S3, Node.js, ReactJS, Axios & Bootstrap 4
Finally, let’s run YARN to build and deploy our front-end…

Conversational AI - AWS Connect, Lambda, DynamoDb, S3, Node.js, ReactJS, Axios & Bootstrap 4
Head over to production and let’s view the deployment…
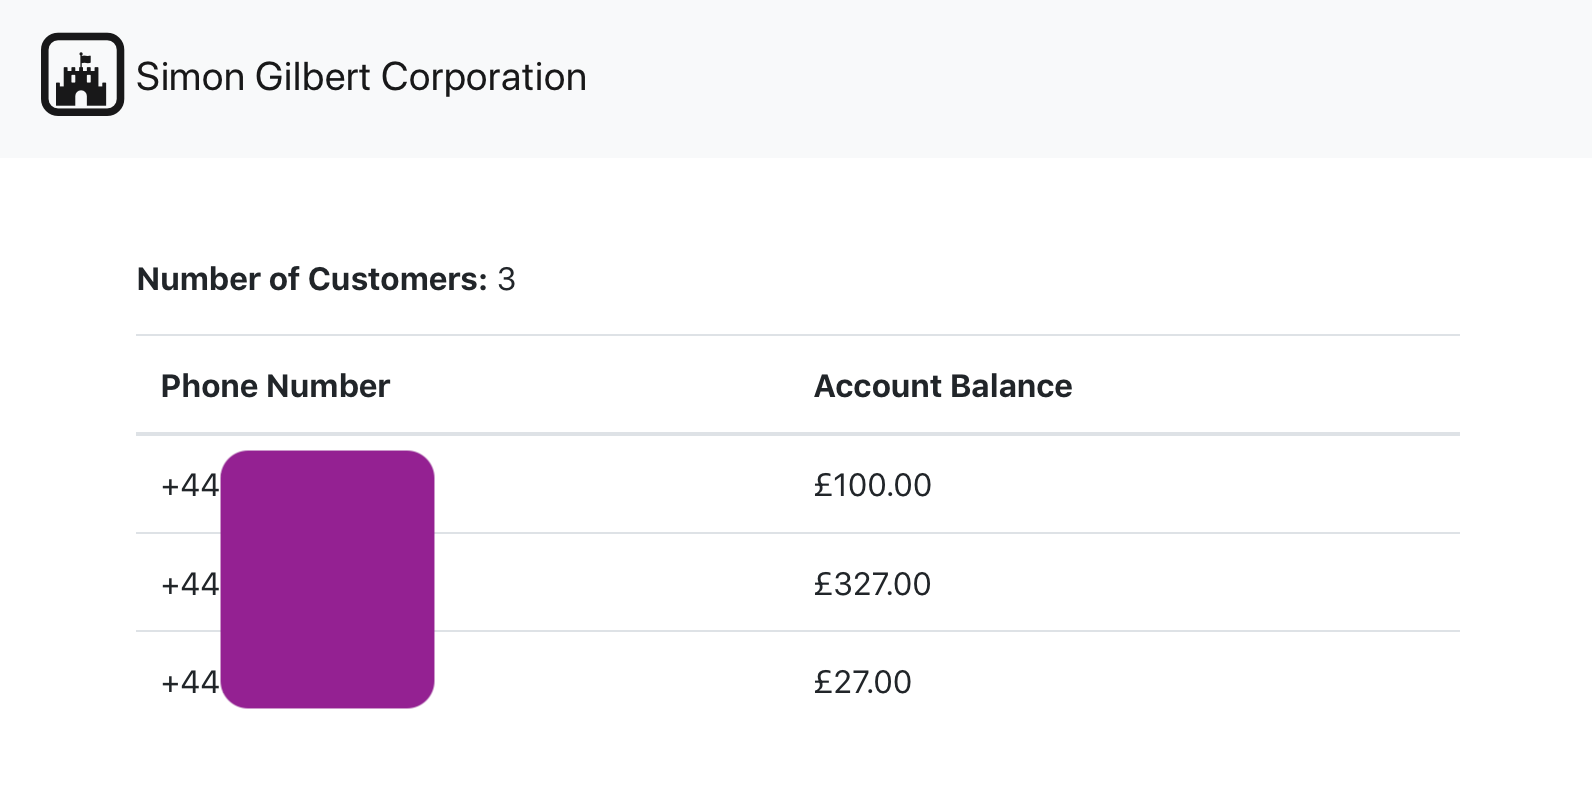
Conversational AI - AWS Connect, Lambda, DynamoDb, S3, Node.js, ReactJS, Axios & Bootstrap 4
BOOM! You’ve just built a fully automated customer service contact centre in the cloud using conversational artificial intelligence and the most current technologies, ENJOY!
Next time we’ll hook the “Create Customer” API endpoint up to our front-end ReactJS/Axios client.
Enjoy!